
Download this Advanced Blender 3.0 Glass shader >>HERE<< – This download will include an easy to adjust free blender 3.0 glass node to get perfect glass every time!
Glass. One of the key materials or shaders and used in nearly every render, and yet with Blender Cycles it unfortunately falls flat on its face. Glass is one of my biggest bugbears in Blender so I’m going to make a blog to show you what you need to do, and what you need to look out for.
For other render engines, if you tell something is Glass material, it acts like a glass material. For Blender you need to give it a little nudge.
Note: this blog will only focus on Blender Cycles Render Glass. We will cover Blender eevee glass shader in another blog. Blender eevee glass materials can be a little tricky sometimes
What’s wrong with glass shaders in blender?
With glass in real life light passes through it but not in a straight line. This essentially creates shadows and light areas. Essentially this is where refraction and caustics comes from (in very simple terms).
When you use the Blender principled bsdf shader settings to set up a glass material on an object, Blender automatically gives the object shadows which is correct like I mentioned above! You have to enable reflective and refractive caustics properties in the render settings so Blender can try to to pass light through it correctly. This SHOULD technically create those shadow and lit areas as mentioned before…
The problem with this though, is that it is very slow, and 9 times out of 10 you end up with a horrible dark shadow at the bottom of a glass which doesn’t look to me very much like refraction! The shadow is far too strong for any refraction object.
As an example here is a glass in Blender and just look at that horrible dark grey base! This is using 64 max light bounces for all light path types, refractive and reflective caustics turned on, clamping turned off. Basically, without setting my computer on fire, this is the best that comes out. This is not realistic glass at all.
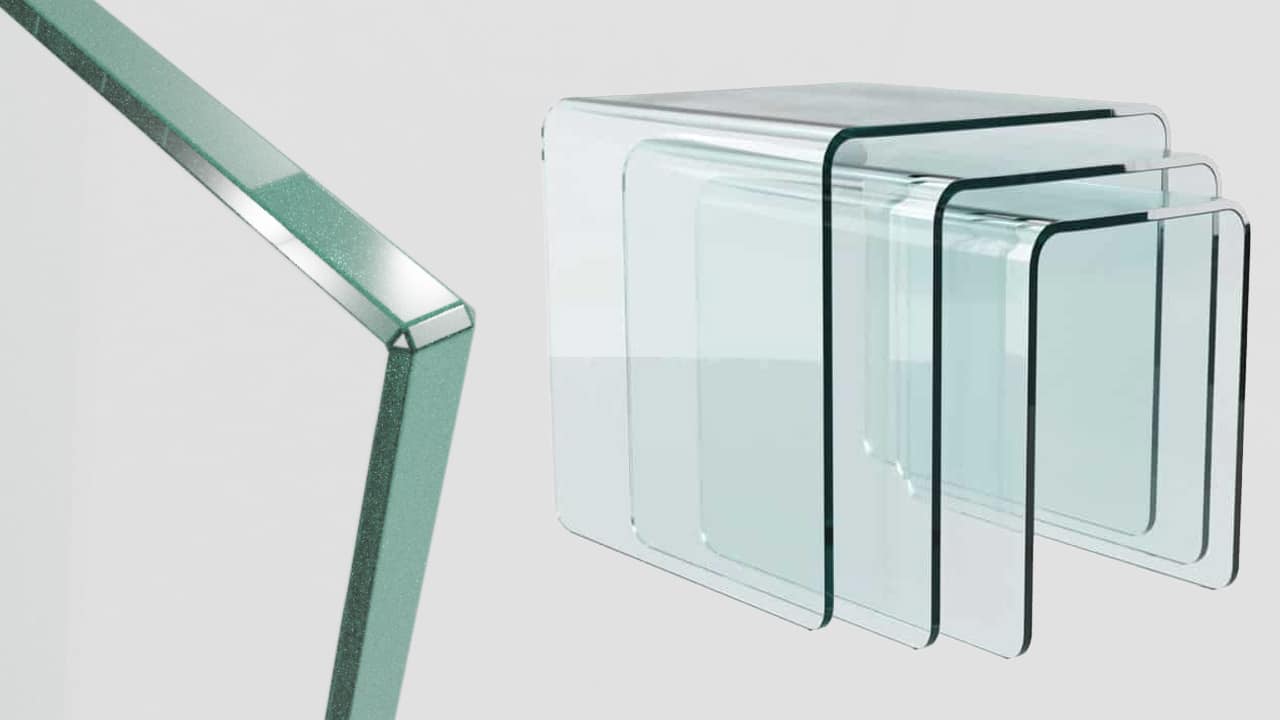
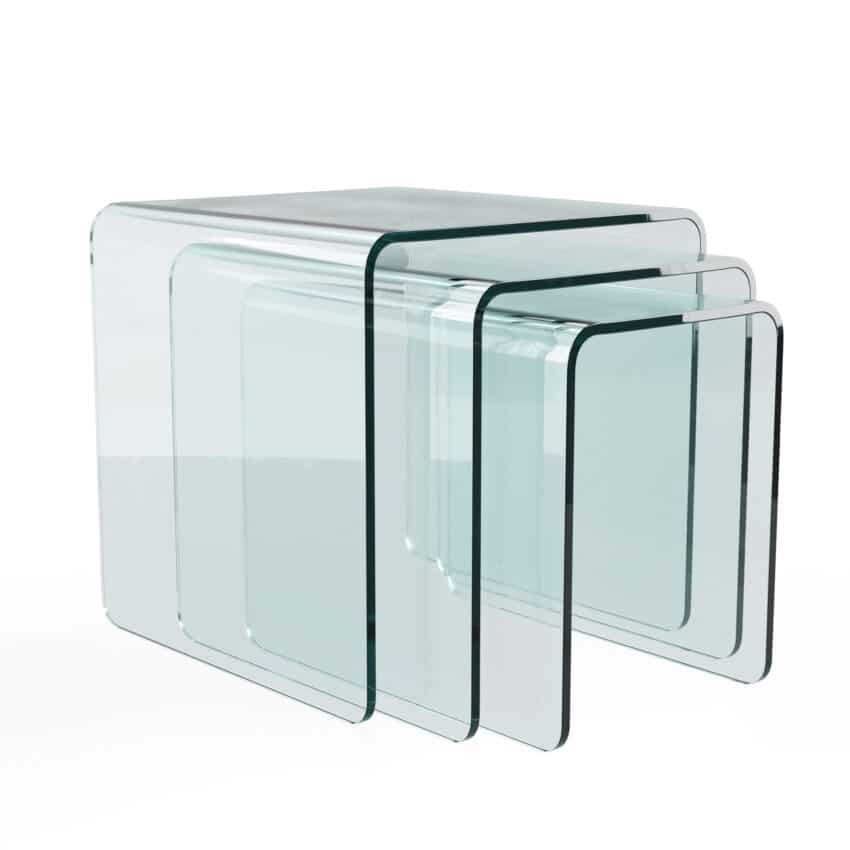
In comparison, here is a photo of real glass (encase you’ve forgotten what glass looks like). The difference is immediate

As another comparison. Here is the Corona render engine. Simply used the base shader, set the material to refract with full gloss and BOOM, exactly what we want. Sorry its a bit dark but colour of the base is exactly how it should be. Just look at the Blender version to compare, it has a darker base even in a brighter scene!
How do you create glass in blender?
As you can see above, Blender is trying(?) to use its physically accurate Principled BSDF shader along with the caustic settings to give you a realistic result. However that is not the case.
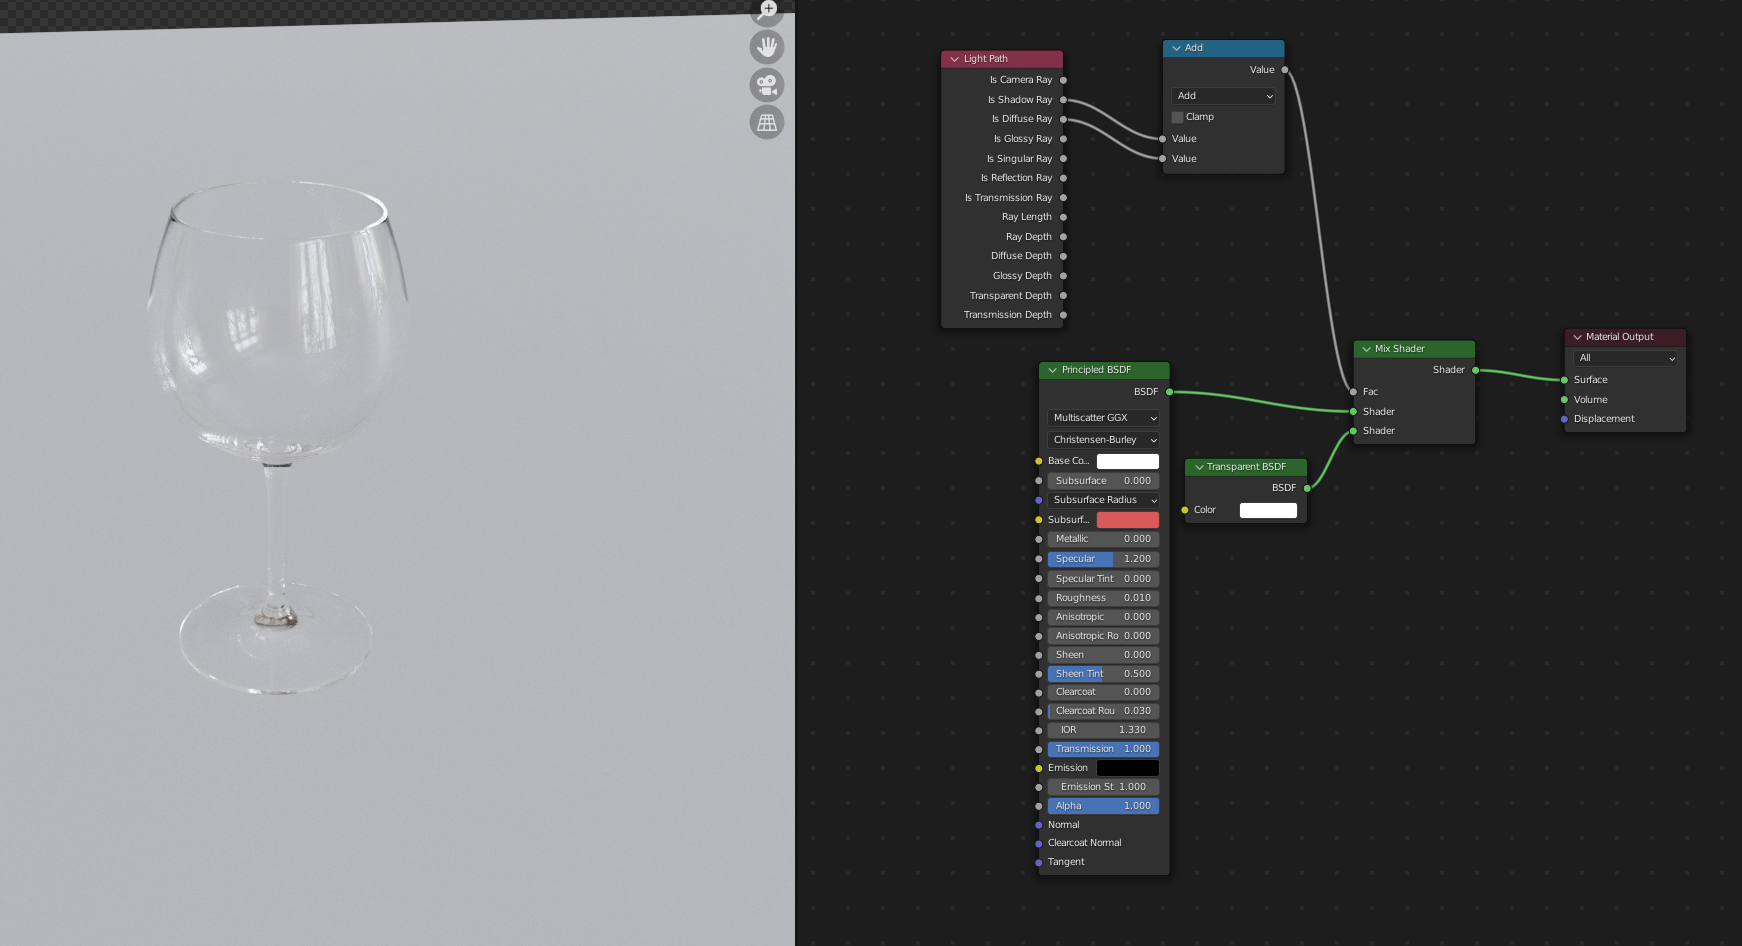
That can easily be fixed with a little node set up and settings. What we have here is:
- A Principled BSDF shader with
- Base Colour set to Pure white
- Roughness set to 0, or 0.01 (nothing is truly purely glossy)
- Transmission set to 1
- The Principled BSDF shader goes into a mix shader along with a transparency node
- Next we will use a light path node to tell it the following
- If there is a shadow ray, or a diffuse ray, then make those rays transparent. We do this simply by adding them together with a math node which connects to the factor of the mix shader
- One Final trick below this image
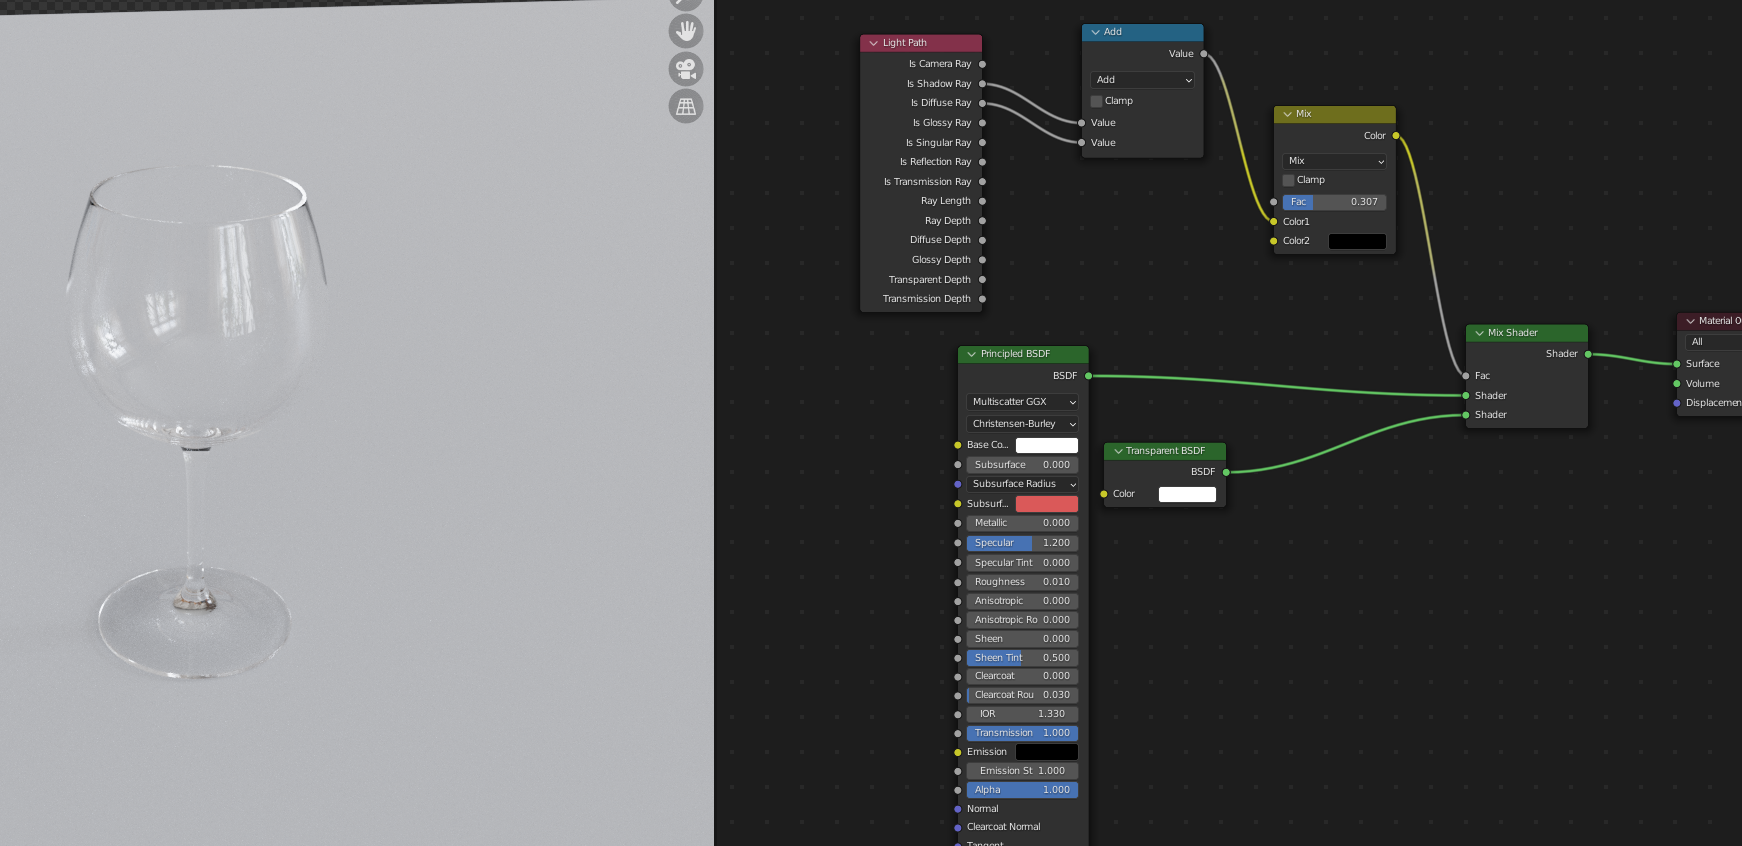
Step 1:
Okay, maybe the complete lack of shadows is not 100% what you want, so if we add a little MixRGB we can add more or less shadow to your liking.
That is more like it! This looks like realistic glass! (below)
Step 2:
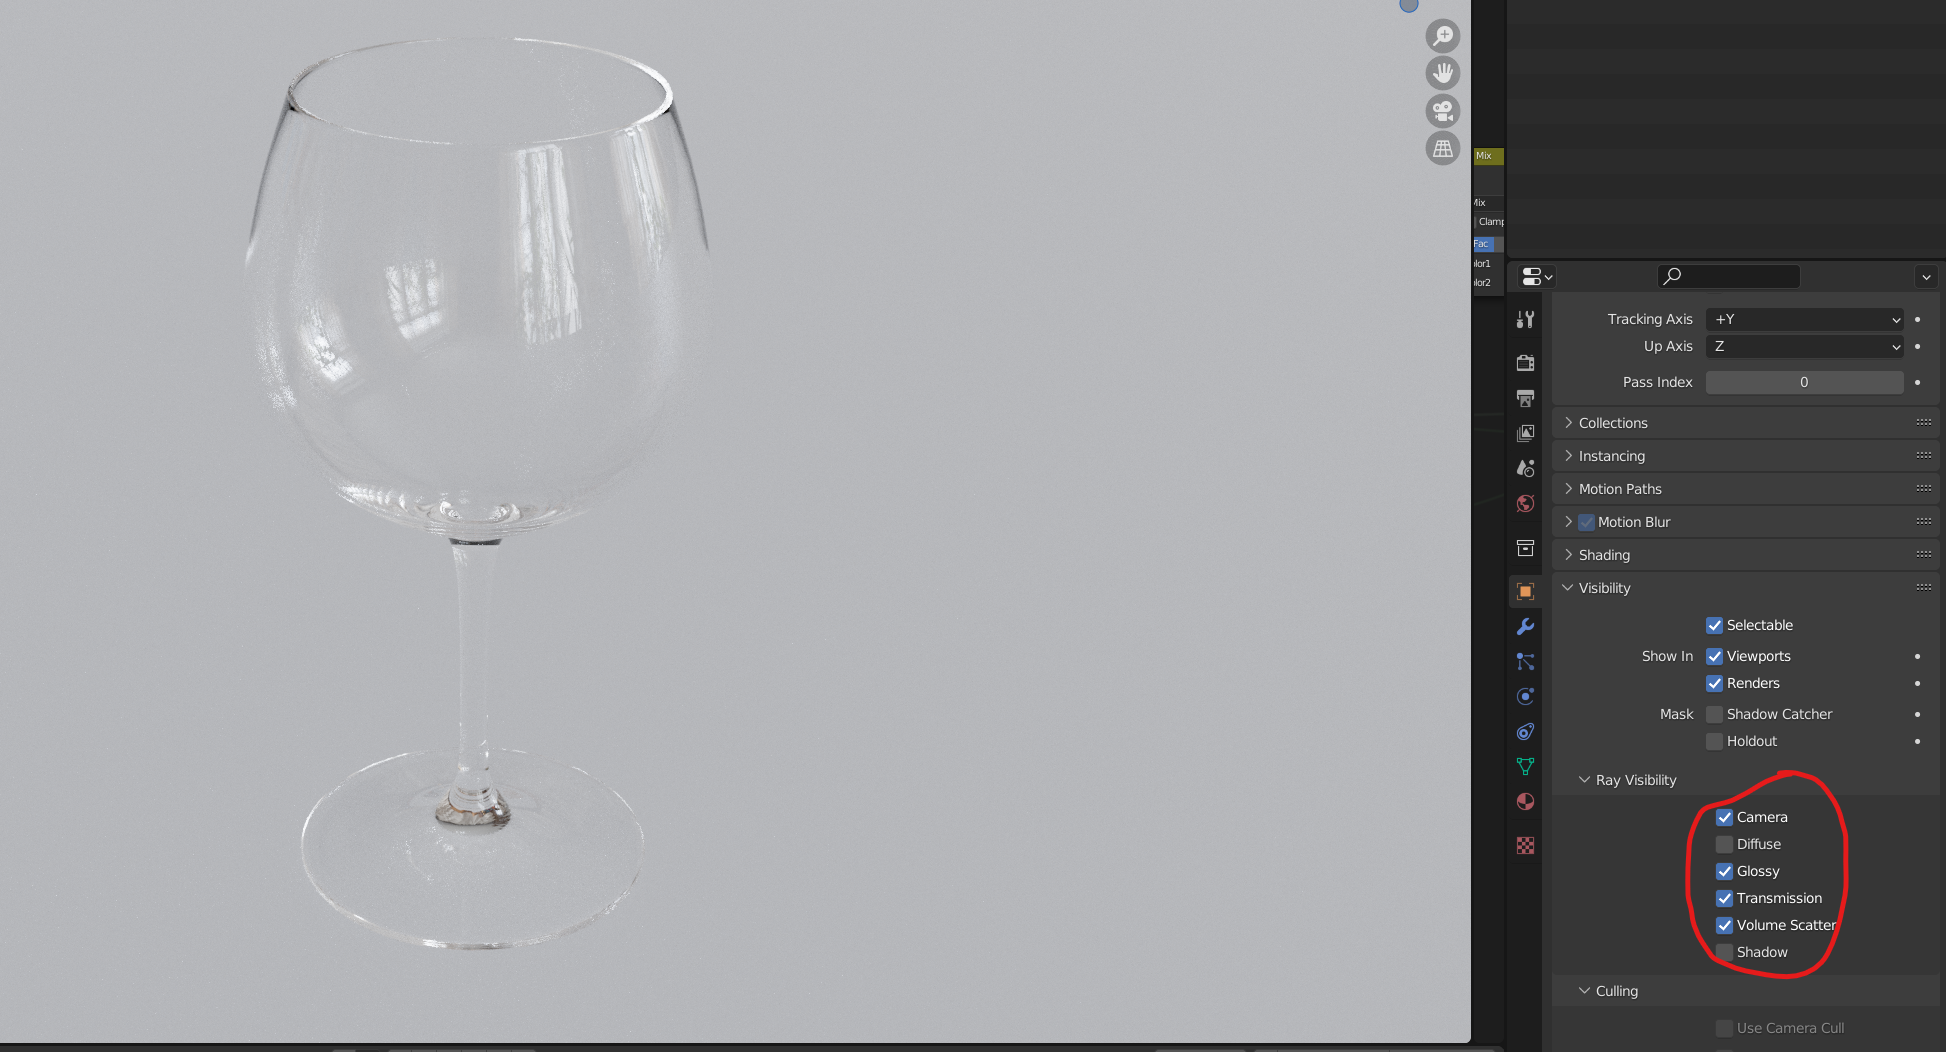
Is that the only method? Well actually no! Blender also has some additional settings which you can adjust for the entire selected object.
Here we can select an object with a very basic glass shader and in the Object Properties panel, under Visibility, we can turn off the Ray visibility for Diffuse and Shadow. This may be a lot easier than the node set up, but you are not able to add more or less shadow if you need it.
How do you make blender architectural glass materials in cycles?
People might be meaning 2 different things here so I’ll mention both in this section
Architectural Window Glass Shader
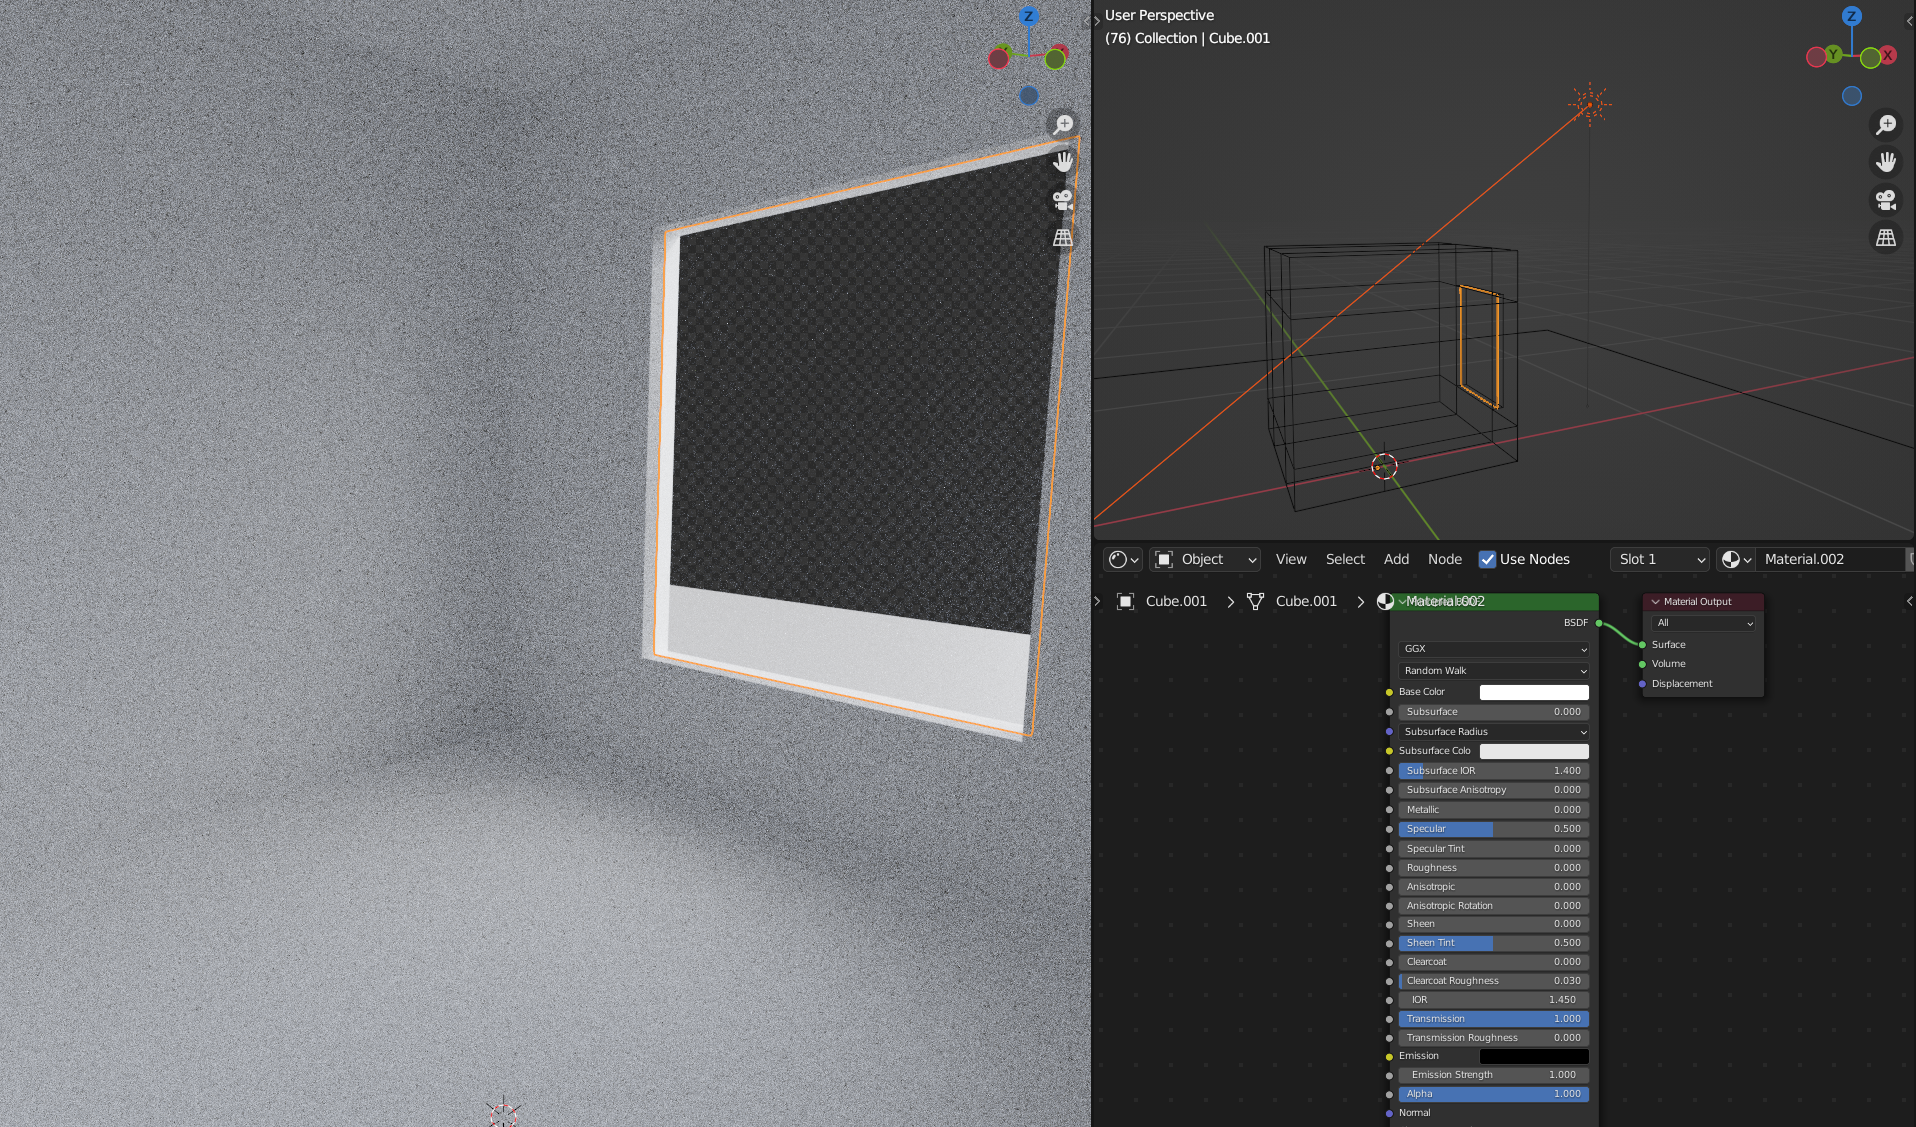
Glass windows in Blender… This is quite frankly the best example of how bad the Blender glass material is. Yes I know the glass is so thin that there wouldn’t generally be any caustics anyway which is what Blender is trying to do, so it does require different procedures but its still glass nevertheless and it shouldn’t be this complicated…
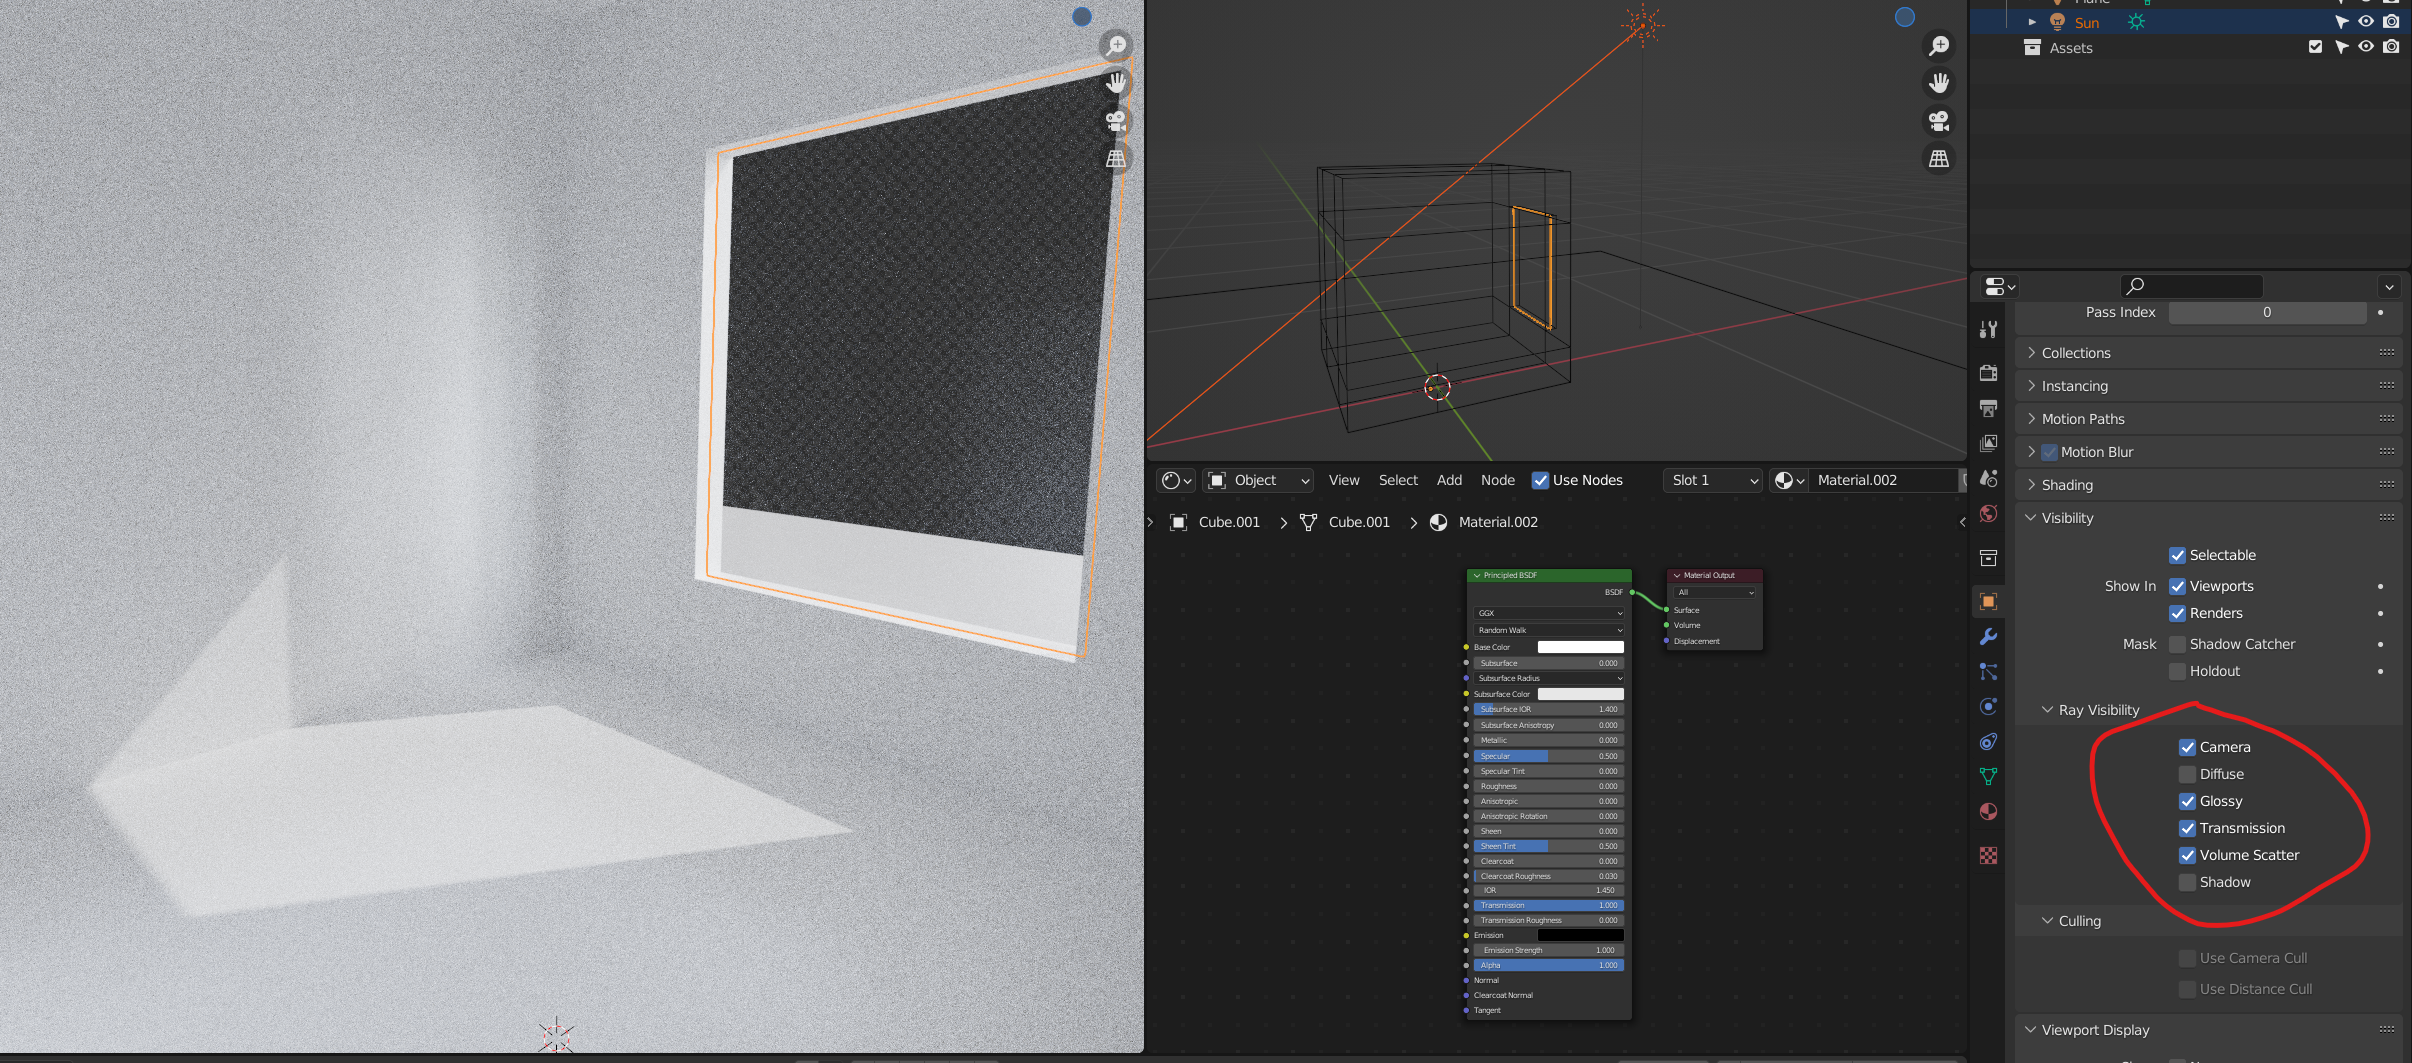
Lets add a room with a sun going through the glass into the room. This is probably the exact problem you have, where is the sun?!
As mentioned above, we need to tell Blender not to give this cycles glass any shadows (or diffuse if you want to), so we can either add the glass shader with nodes or if the glass an independent object we can just turn off the glass with the Object Properties – Ray Visibility settings like below
YEY THERE IS THE SUN! (remember you will need to use the node set up mentioned above if the glass is attached to a frame, unless you detach the glass from the frame)
So what was happening? Basically the default cycles glass shader is casting a shadow into the room, which means its blocking the sunlight. Makes sense right?…….. (please blender devs, at least give us a tickbox on the Principled BSDF shader which turns off shadow rays)
So to answer your questions, how do you make blender glass transparent, or how do you give blender glass transparency, well there is your answer! It’s actually quite simple once you know.
Green tinted architectural glass in cycles
This is the other type of architectural glass people might be referring to. This is basically the glass which has a slight green tint or it goes very green when looked at from the edge
Here is a prime example, the edge is very green and the thicker parts appear green. the green tint is a bit strong here but you get the point
So how is this achieved?
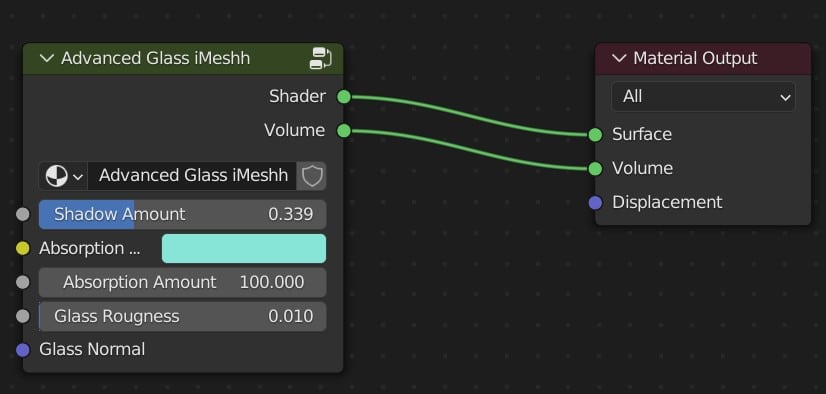
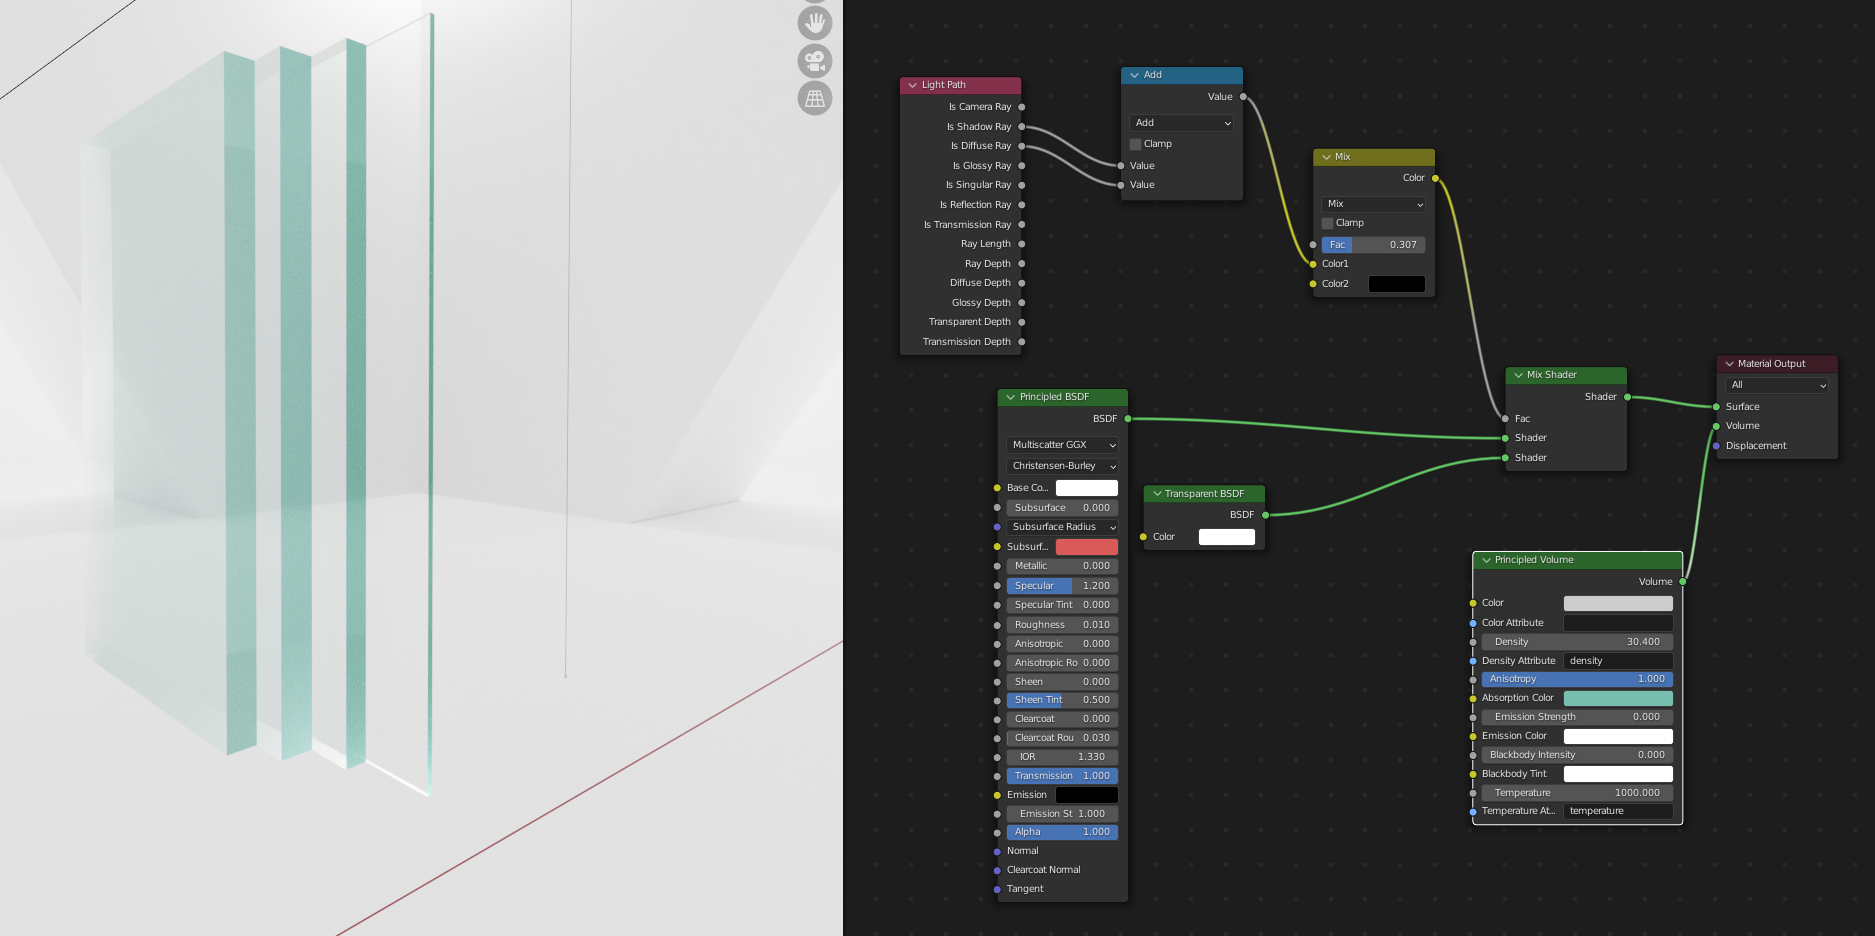
Well, its simple. First lets grab the node set up we made earlier and then add the node Principled Volume into the Volume output of the node shader like this

But this is not green so we need to give it a cyan Absorption Colour, and then put the Anisotropy to 1. Now you have something that looks like this. The thicker bits look more green and the thinner parts appear clear but the edges are green. PERFECT!
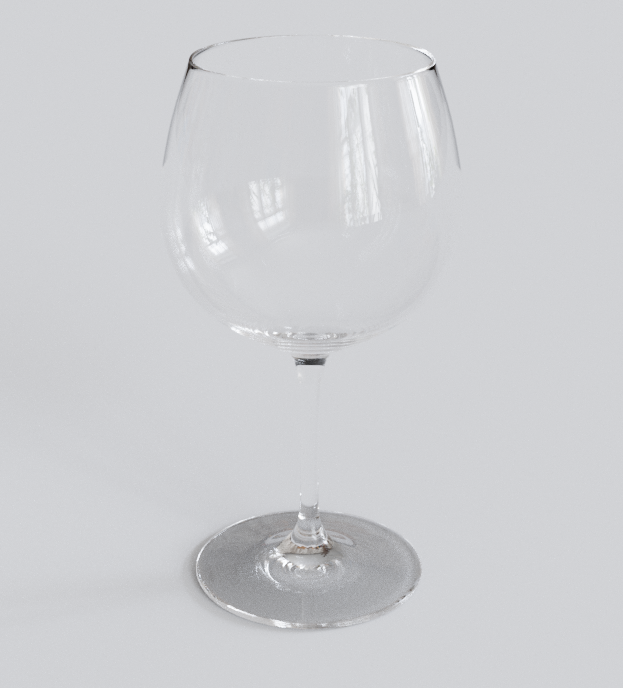
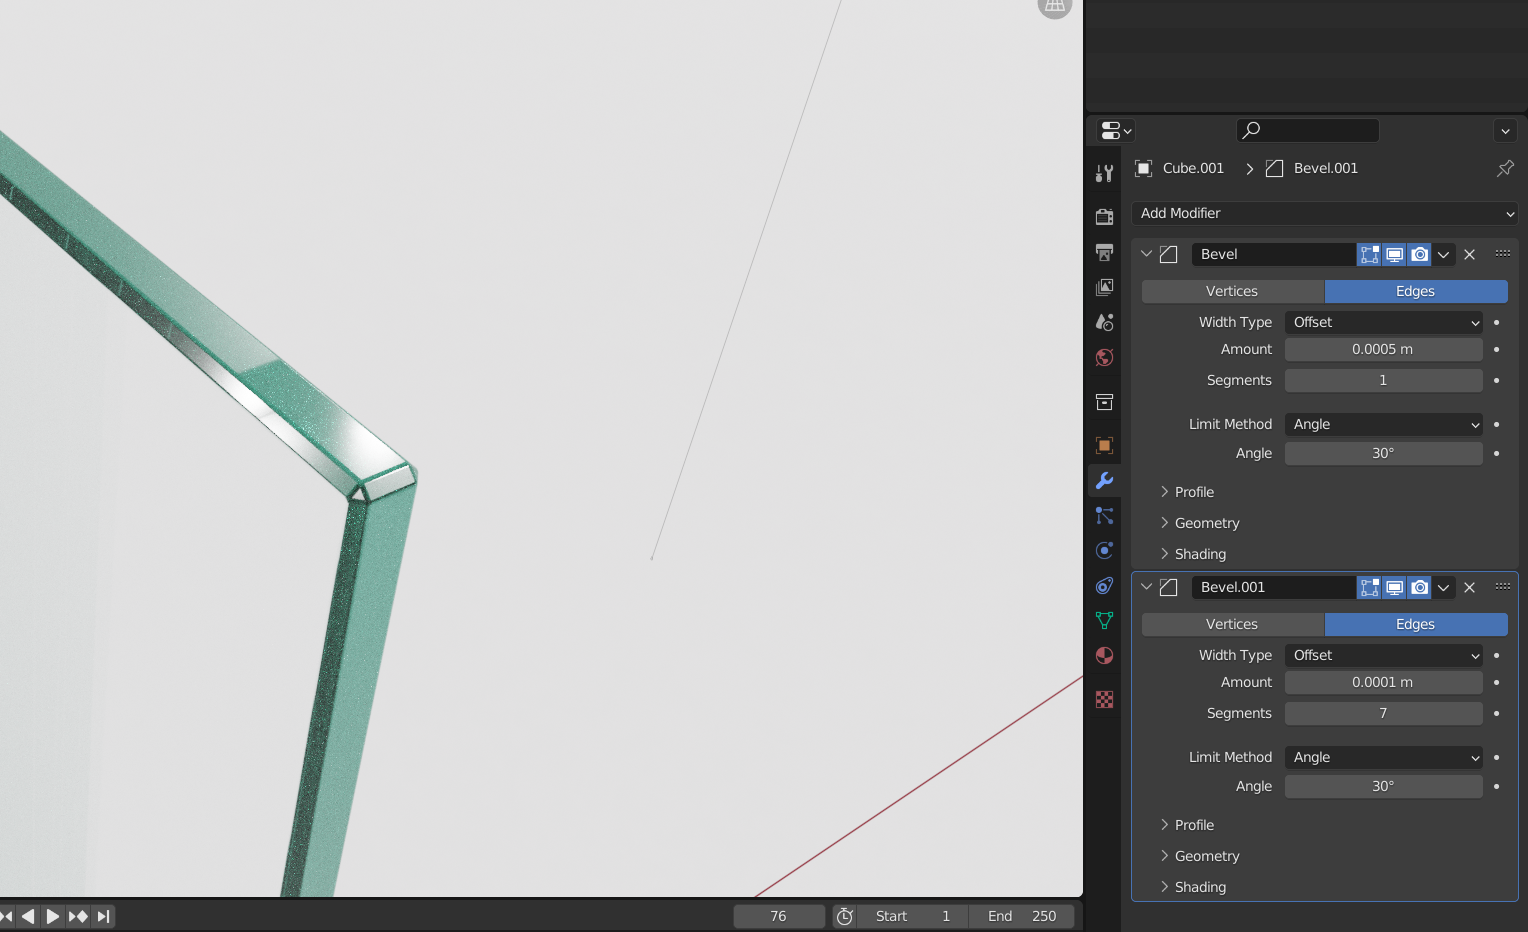
Top top it off, lets add a nice double bevel effect. That is some good looking glass!
How do you make blender glass reflections better?
This is something I really like about the Corona Render engine. For some reason, it’s glass materials reflective areas just pop for some reason, just like glass. The refraction along with the reflections just add up to make a totally realistic glass material.
So what can you do to make the Blender glass reflections nicer within the cycles render engine?
This one is maybe a little more involved if you are not familiar with post production but the end result is very nice. And for simplicity I am going to only be using the glass properties I made earlier in this blog.
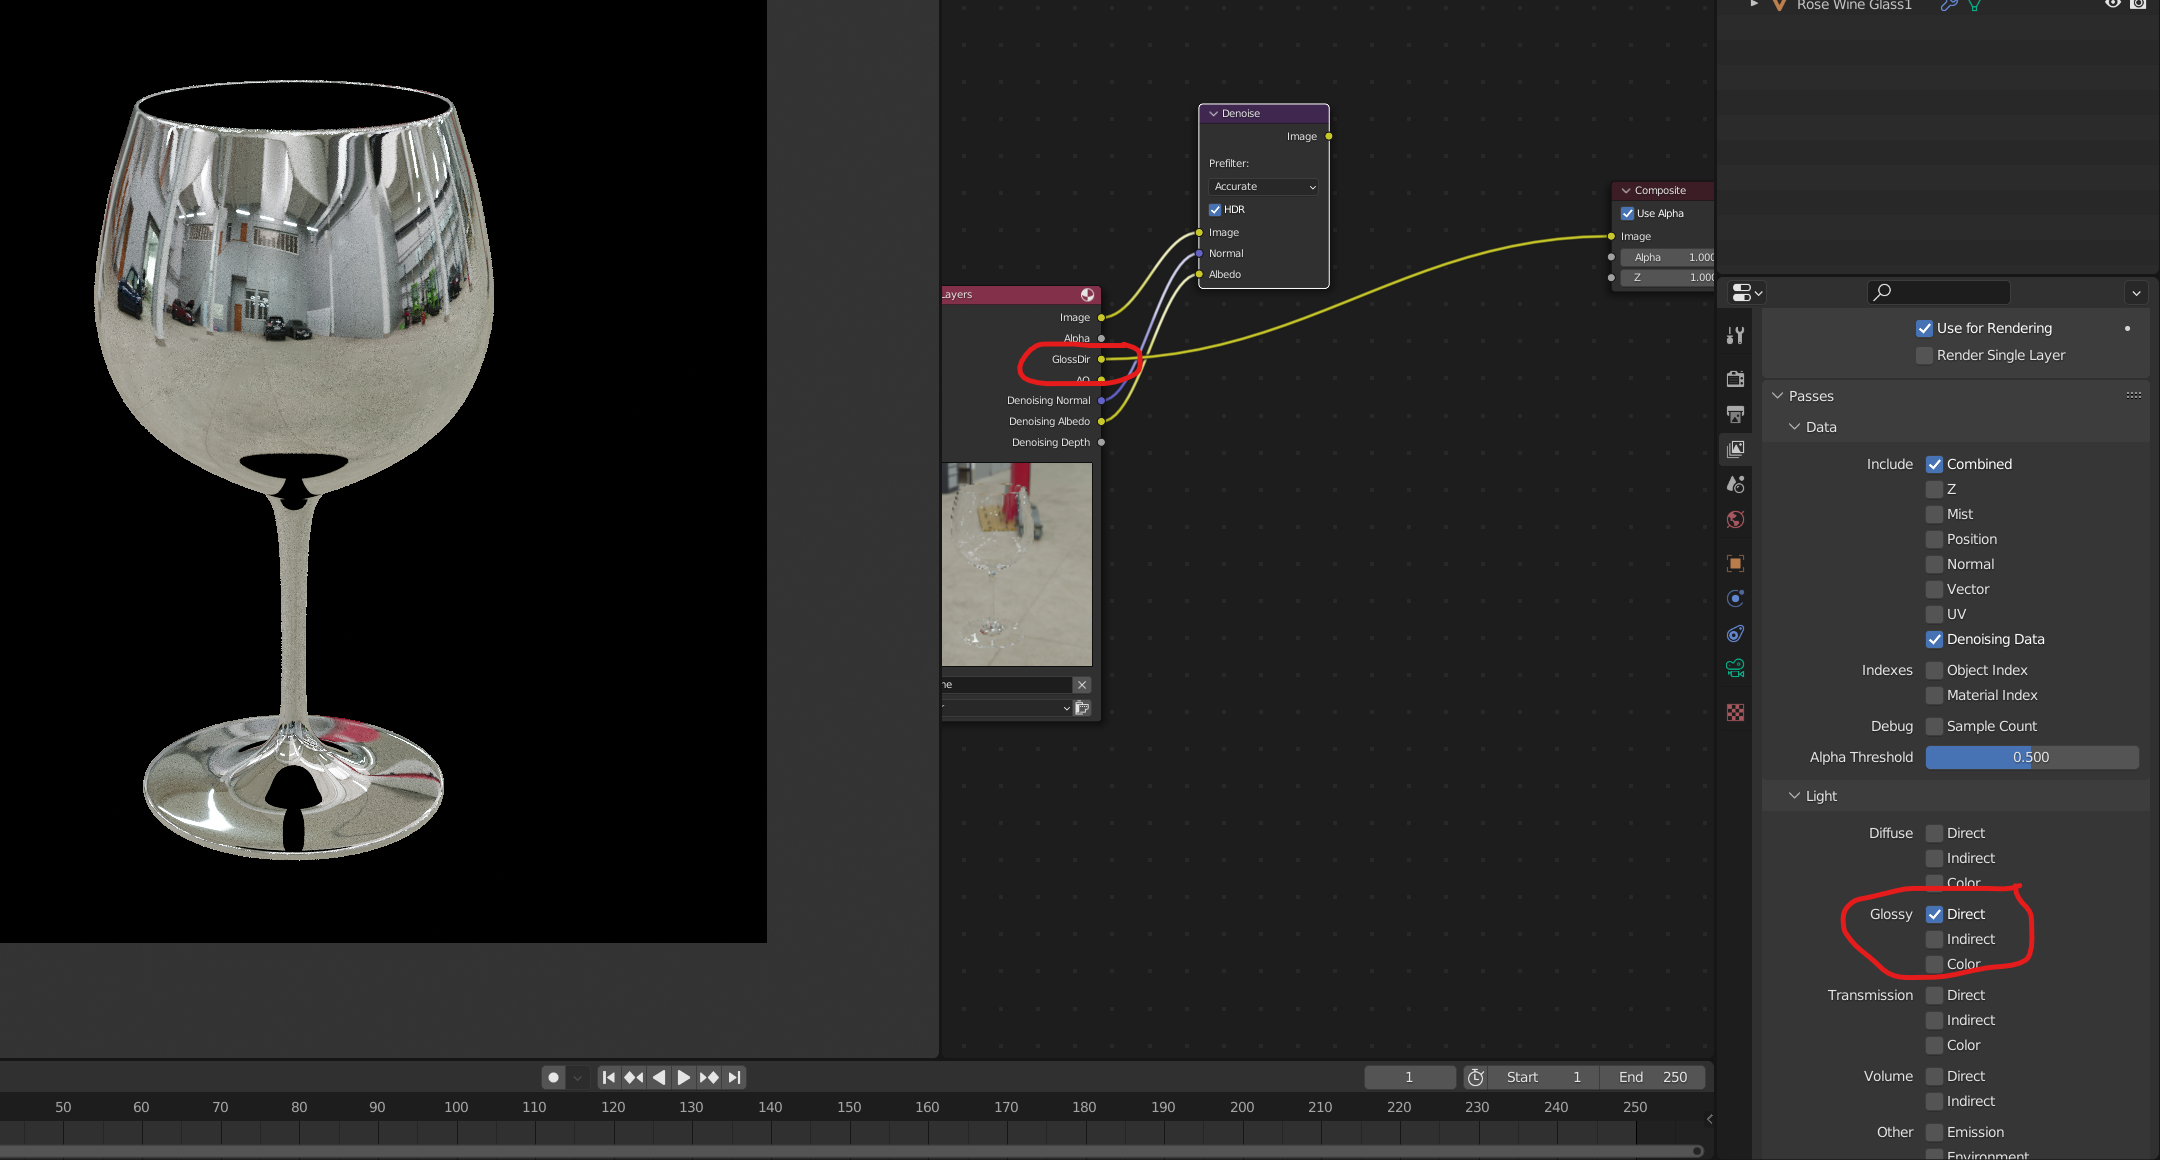
What we want to do is go to View Layer panel and tick Gloss Direct.
Now, when you hit render it will render an additional render pass which is only showing the glossy direct path which looks like this. You can also experiment with gloss indirect and gloss colour if you like but in this instance gloss direct works for me
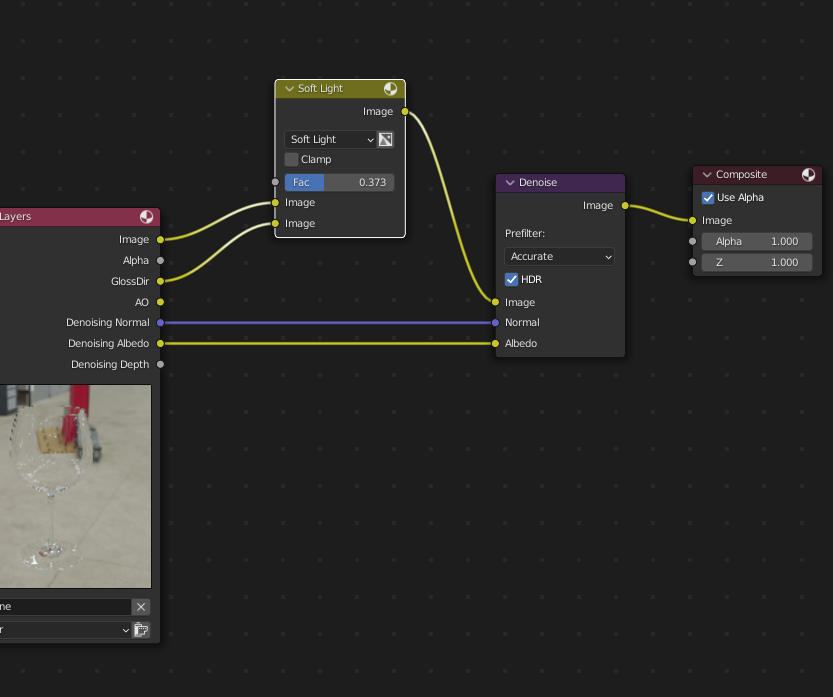
Next, lets get a mix this in with a soft light blend mode inside the mix node. You can run it through the denoiser then too if you wish!
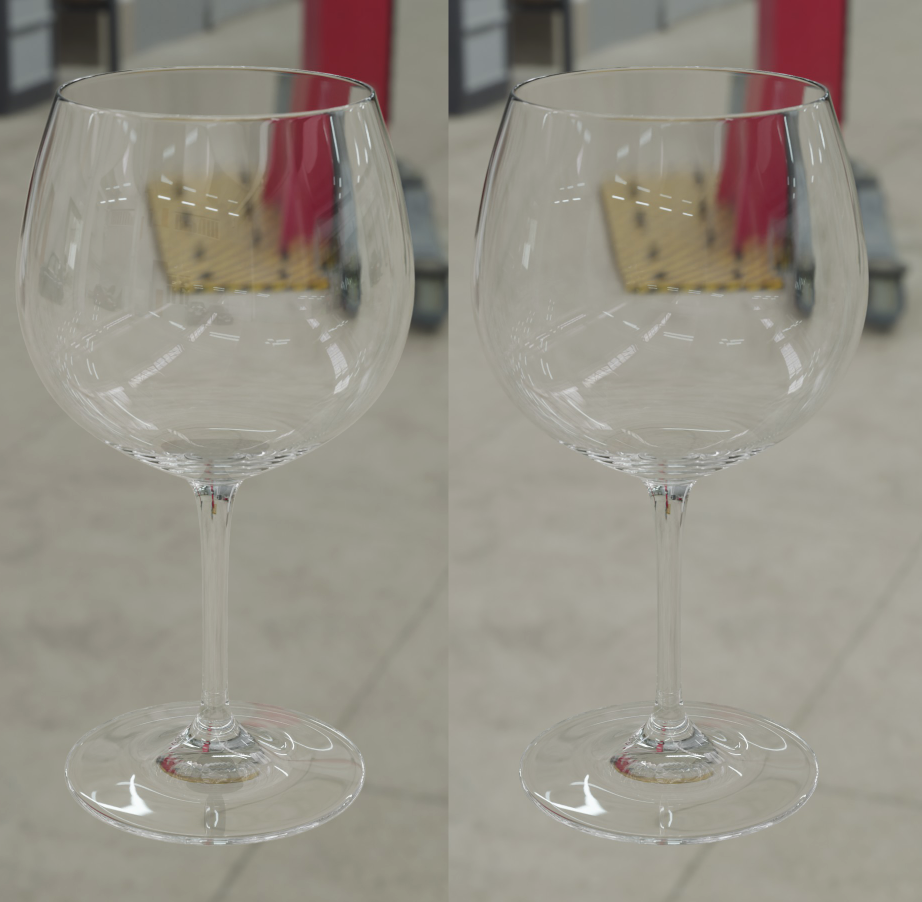
Now what we have is a more contrasty glass but it really highlights the reflections! Because this blend mode (soft light) also adds contrast to the whole scene, it might be ideal to only do this using masks (also easy enough to create in Blender)
By comparing these two images, the version the left which has been edited just has some extra juice to it which makes the reflections pop and standout against the background! You can see much more easily the reflection of the items behind the camera.
What are the ideal glass render settings?
The render settings I like to use for nice glass materials in cycles are the following
- 32 light Max bounces across the board. This is my default setting but you may need to reduce this based on your computer hardware.
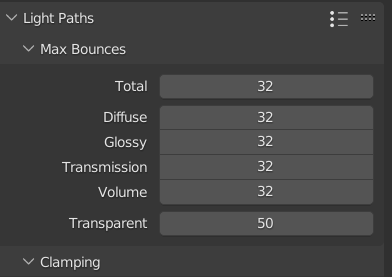
- Next, lets set light clamping to 0. Beware this could introduce fireflies, but it REALLY HELPS with the highlights on the glass materials

- Be sure to turn on Reflective and refractive caustics.

- You could try lowering the Pixel Filter to 1.15 which makes a slightly sharper image but this can cause some antialiasing problems. However, the highlights in the glass materials can appear more crisp and in general a more realistic rendering.

Thank you for reading about blender glass shader in cycles!
I hope that I was able to teach you a thing or two on how to create glass inside Blender. It can be an annoying little challenge at the start but I can assure you, once you’ve done it a few times it becomes second nature and you’ll always end up rendering excellent glass!
I really do hope to make a eevee and cycles glass blog sometime soon, and if there is enough interest them please do let me know!
Want 3D models for Blender that already have good glass?
Here at iMeshh we offer a ton of 3D architectural models. We aim to ensure all of our materials render beautifully out of the box and without any further adjustments.
If you are interested and would like to get your hands on these models then we offer (at the time of writing this blog), 1300 archiz assets for Blender for only $99!!
Interested in Archviz? Why not check out one of our latest tutorials! CLICK HERE to find out more
Thank you very much for these tips, it’s very helpful when it’s published in the blog in addition to the video – the information and tips in the blog are clearer and also thanks to the pictures the settings of the nodes and other settings in the blender are much easier to understand even for beginners.
I like the helpful information you provide in your articles.
I’ll bookmark your blog and check again here regularly.
I am quite certain I’ll learn many new stuff right here!
Good luck for the next!
Thank you!!
Thank a lot for your kind support!!