There are several methods to duplicating objects (in object mode) in Blender and it is very important to understand the differences and their use cases so you can run a highly optimized blender file.
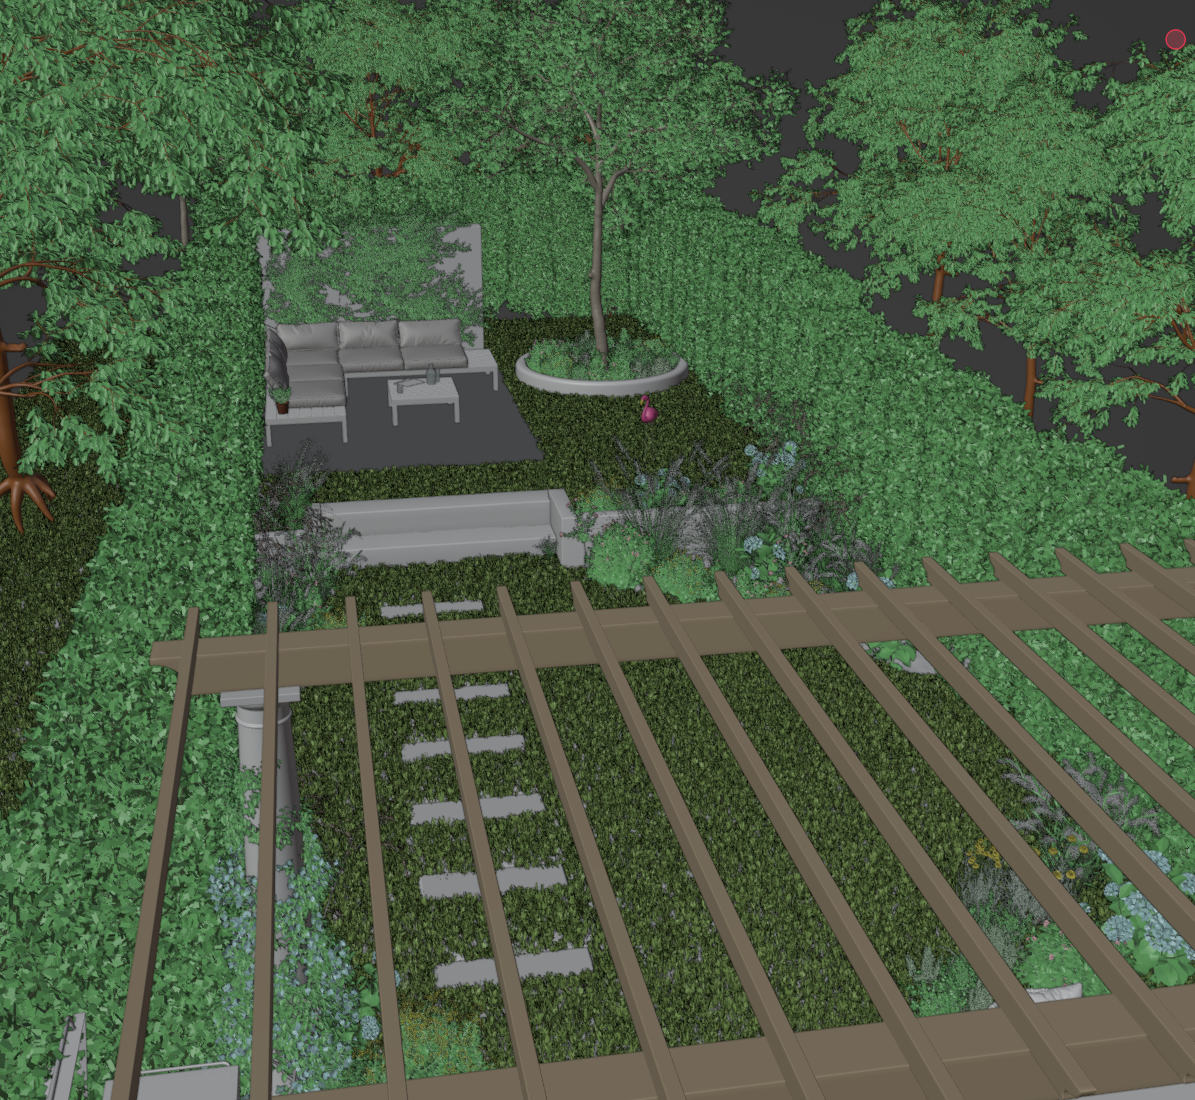
As an example here is an image from a garden scene with millions and millions of polygons, and yet it renders on an 8GB GPU! This is because of collection instances and duplicate linked objects.
The scene can be found on iMeshh here – https://shop.imeshh.com/product/full-garden-scene-animation/
We will not be talking about linked or appended objects here, which refer to different methods for importing objects, but rather duplicating objects that are already inside Blender.
What are the different ways to duplicate objects inside Blender?
Duplicate Object – Shortcut Key: Shift D
This is the most simplest form of duplication. This is what most people will be using because it makes most sense and is easiest to understand.
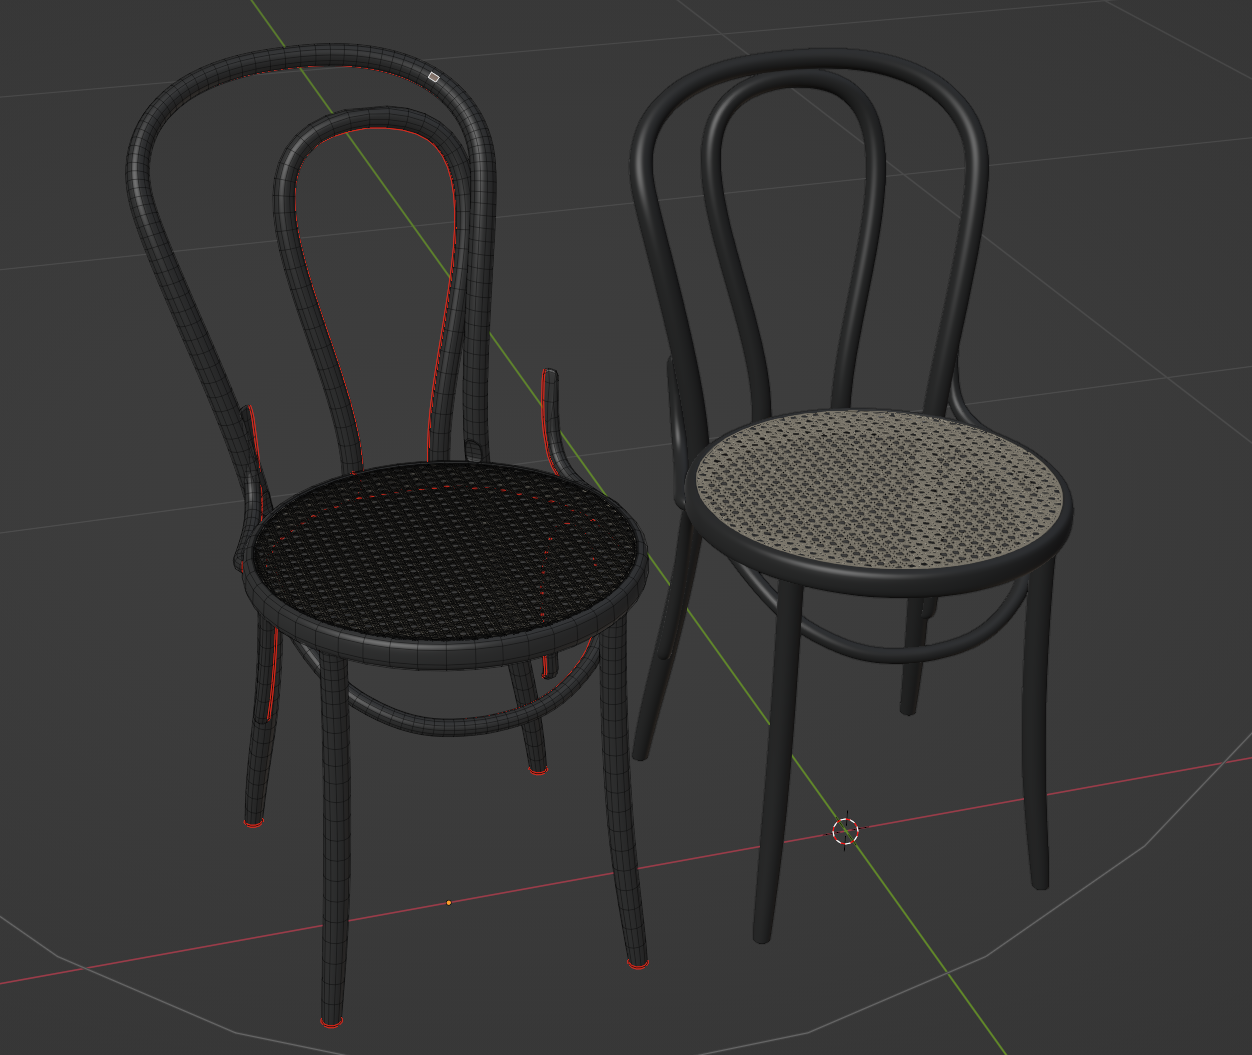
If you have an object in your scene and you want to make a copy of it, you press Shift D. This copies the original object including its object data, material properties and everything else associated with the object.
The newly created object duplicate can be edited independently in edit mode from the original and Blender now counts these two objects as separate objects entirely.
This does mean that this adds to the RAM usage for the newly added polygons in the scene. As an example you have 1 object with 1million faces, you duplicate the object and now there are 2million faces. Simple!
Duplicate Linked, also known as Deep Link – Shortcut Key: Alt D
This is a tool which I see get used less often but it is INCREDIBLY important. If you use Alt D (duplicate linked) instead of Shift D, you’ll be creating exact linked duplicates of the original selected objects, but this time if you edit one object then you’ll also be editing its linked duplicates.
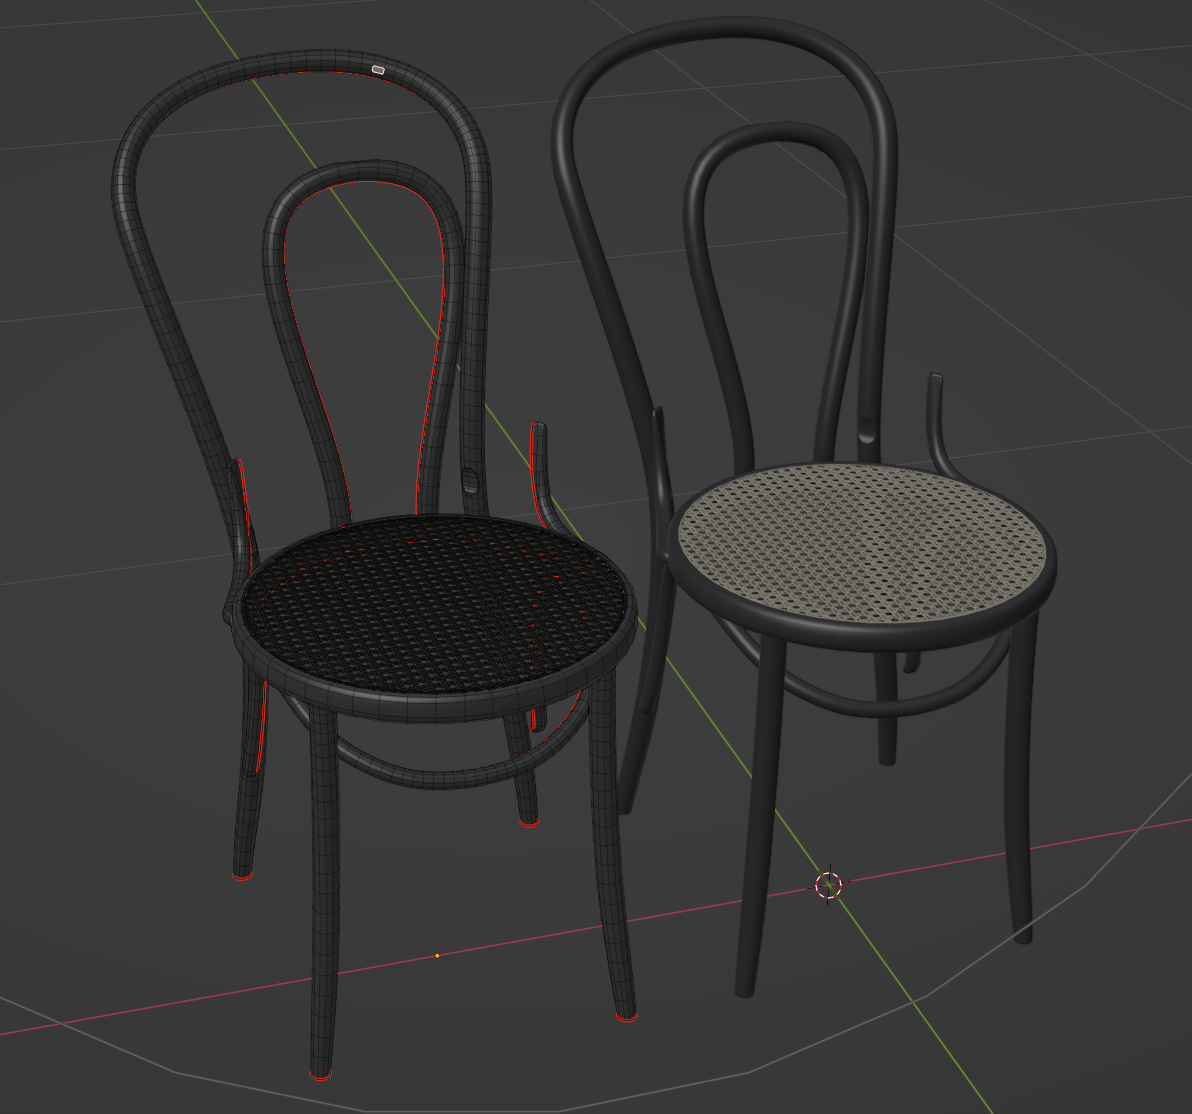
Because you’re using the same object data for the new copy, Blender will only need to read the original copy and not all of its linked duplicates. So if you have 1 object with 1million faces and you duplicate linked the object, you now have 2 objects, Blender will still read this as only 1million faces.
Alt D is a huge help when it comes to RAM usage as you can duplicate link this object 100 times with almost no impact to RAM usage.
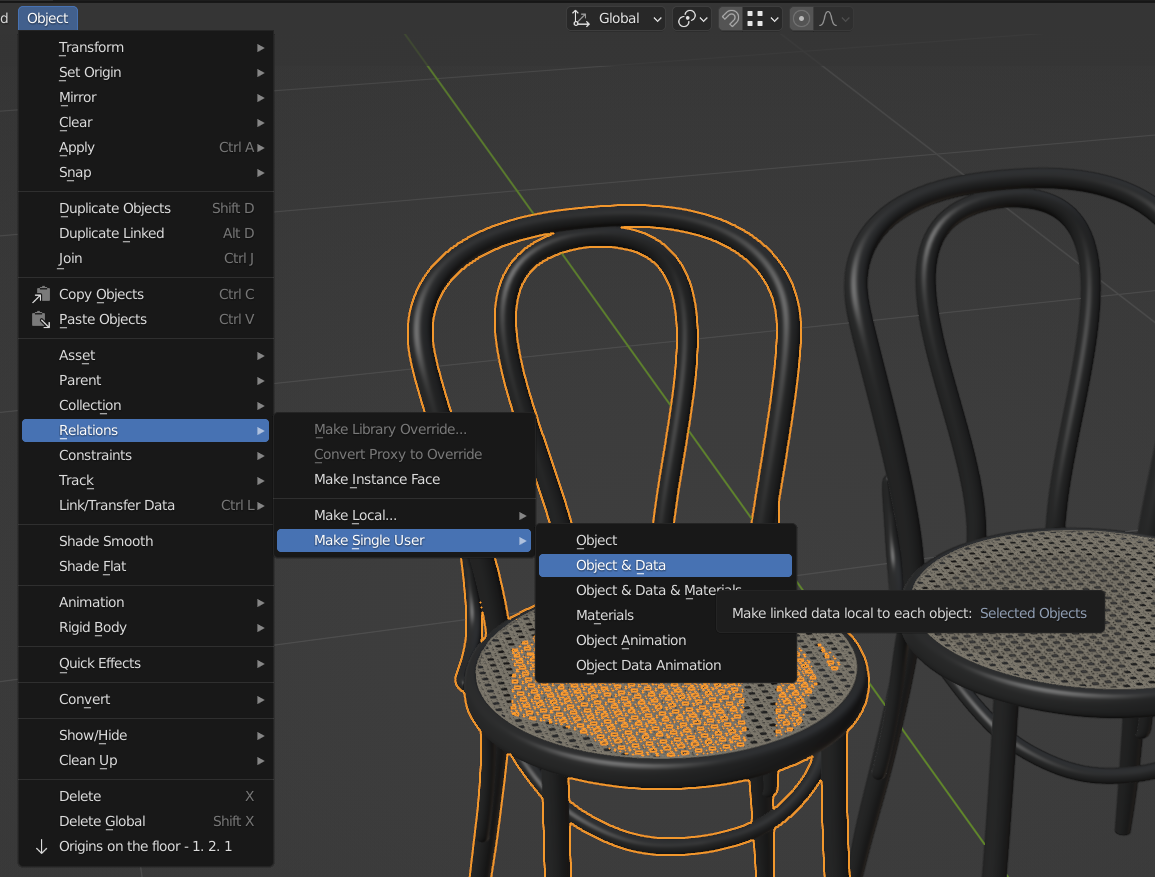
How do you unlink duplicate objects in blender?
So let’s say you Alt D an object and now you have two of them. If you want to edit one independently from the other then you must unlink the object and mesh data.
To do this, you need to go to Object > Relations > Make Single User. But remember, if you do this you’ll be adding to the RAM usage as they will both now be totally separate objects. So if you go into edit mode, they will not edit each other together.
What are Collection Instances in Blender?
This is where things get a little more complicated but in essence this works very similar to Alt D but for entire collections rather than for individual objects. So it has the same amazing scene RAM saving but it requires a little more explanation.
Collection instances allow you to take a collection from the outlier and make an instance of this entire collection into your scene. This entire collection instance will have one single origin point and all objects will move together as one.
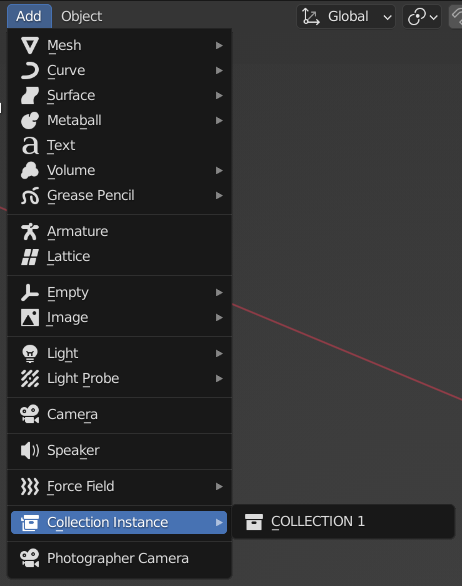
To make a Collection Instance, select all the objects you want and press M, write in the name of the new collection and press Enter. Then in the viewport press Shift A and click Collection Instance and press the name of the newly created instance. You’ll now see a duplicate linked version of the collection.
What makes collection instances so powerful?
Collection instances let you make instanced duplicates of collections without adding to scene RAM usage, and objects can be shared between multiple collections. You can even make an instance of a collection which has collections inside that collection.
You could build an entire environment with bushes, trees and shrubs and make that entire scene an instance to scatter over an entire landscape.
How do I move the origin for a collection instance?
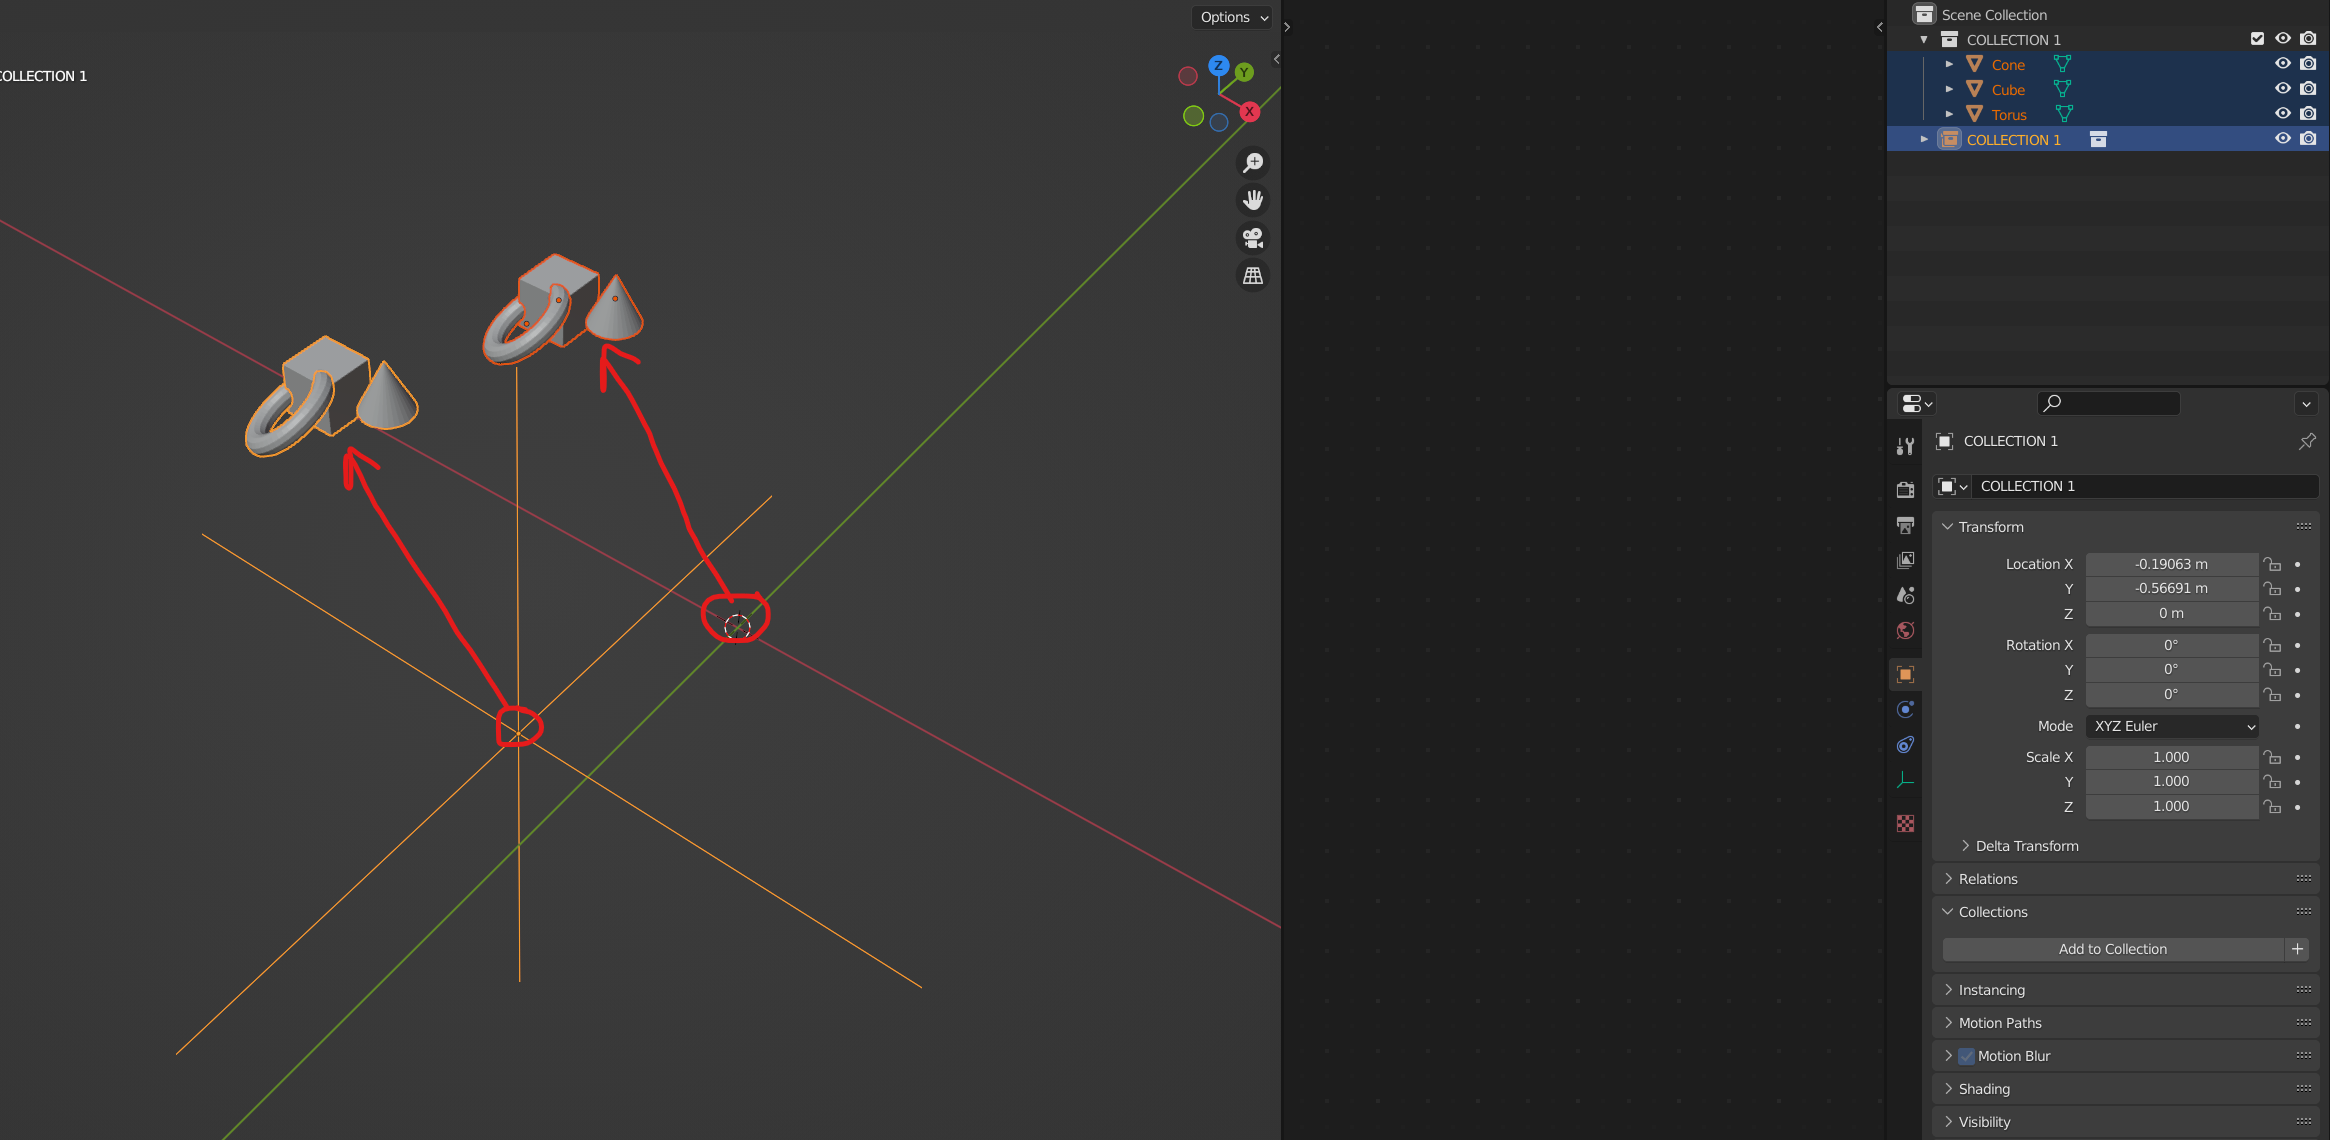
One big problem people have with collection instances is that any new instance the person creates will be offset from 0,0,0 or the world origin.
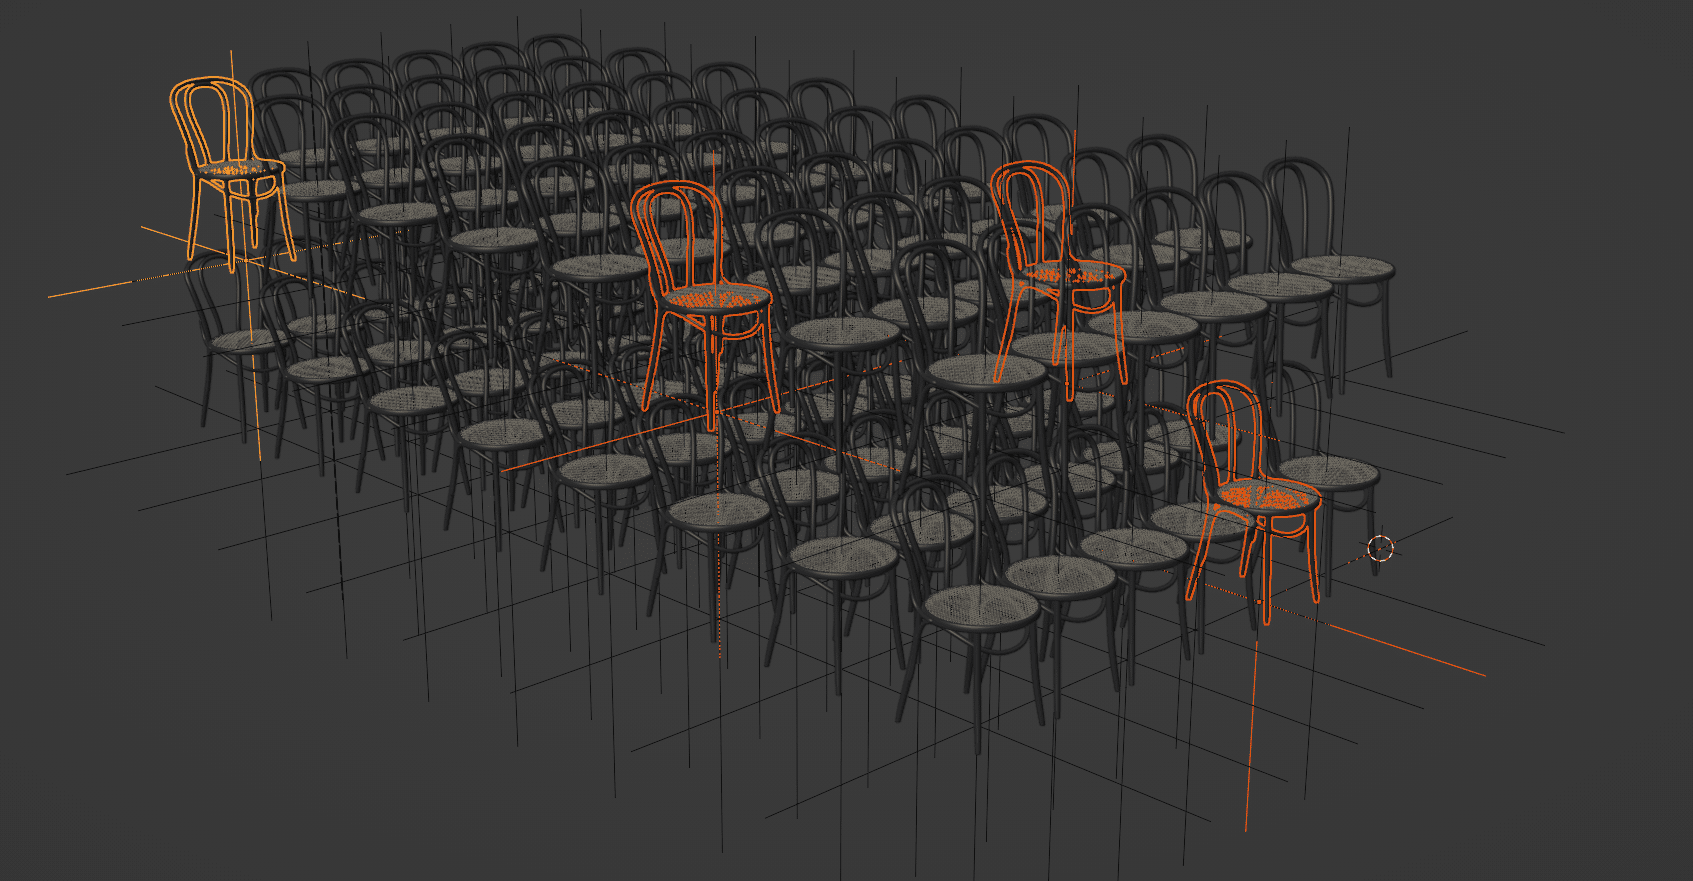
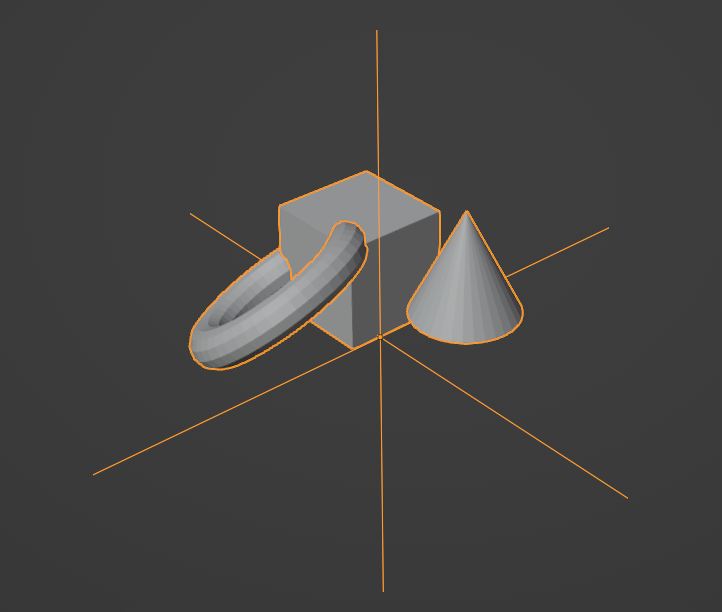
As an example, I have made a cube, cone and torus and put them into a collection called COLLECTION 1
I then pressed Shift A and added a collection instance of COLLECTION 1, and you can see that both the original objects (dark orange) and the collection instance (light orange) have the same offset from its origin. The origin for the collection instance is shown by the empty.
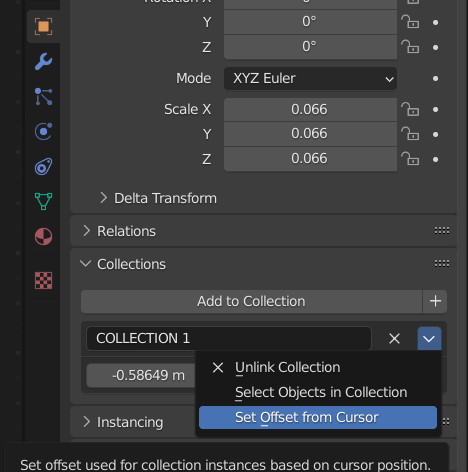
To fix this, add the 3D cursor anywhere you want the origin to be for the collection, then select one of the objects in the original collection and go to the object properties tab. Then under Collections click the little down arrow and click “Set offset from Cursor”
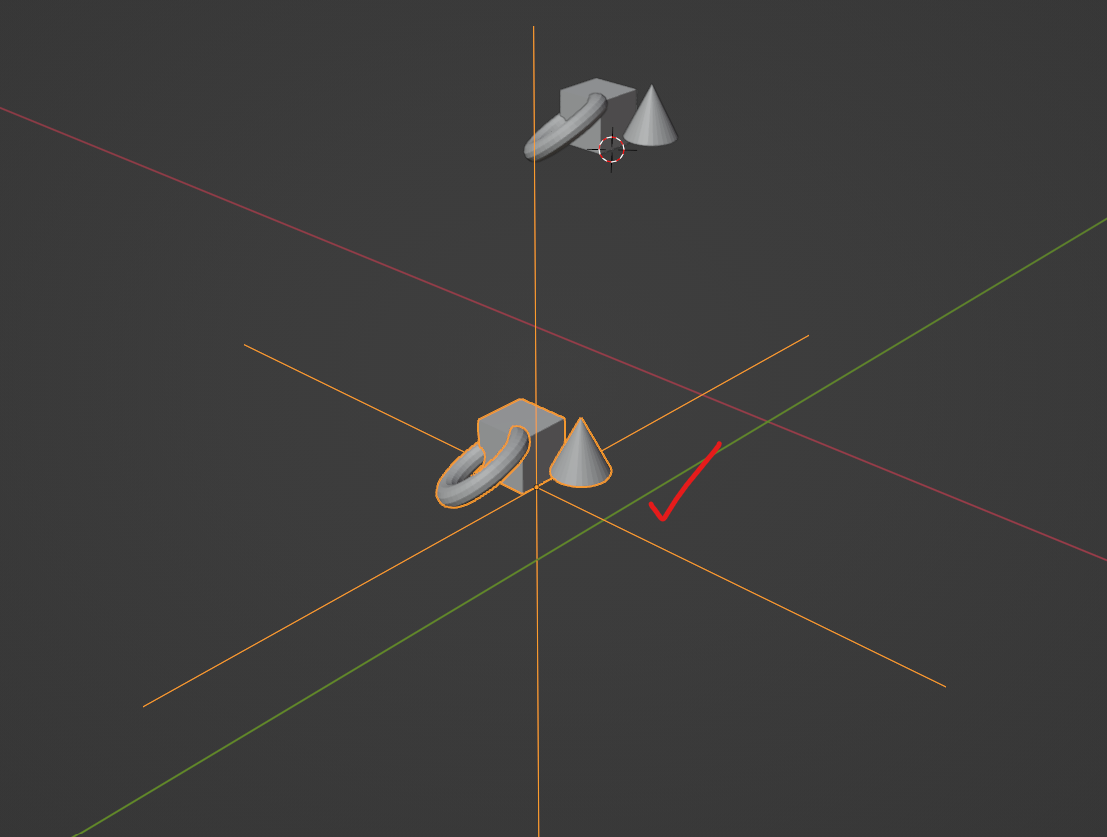
Now, we can see that the COLLECTION 1 instance that I made now has a much more usable origin point which we can scale, rotate and move.
Why should you use collection instances?
You can just use Alt D right? What is the point in messing around with the collections, changing the origin points and all that?
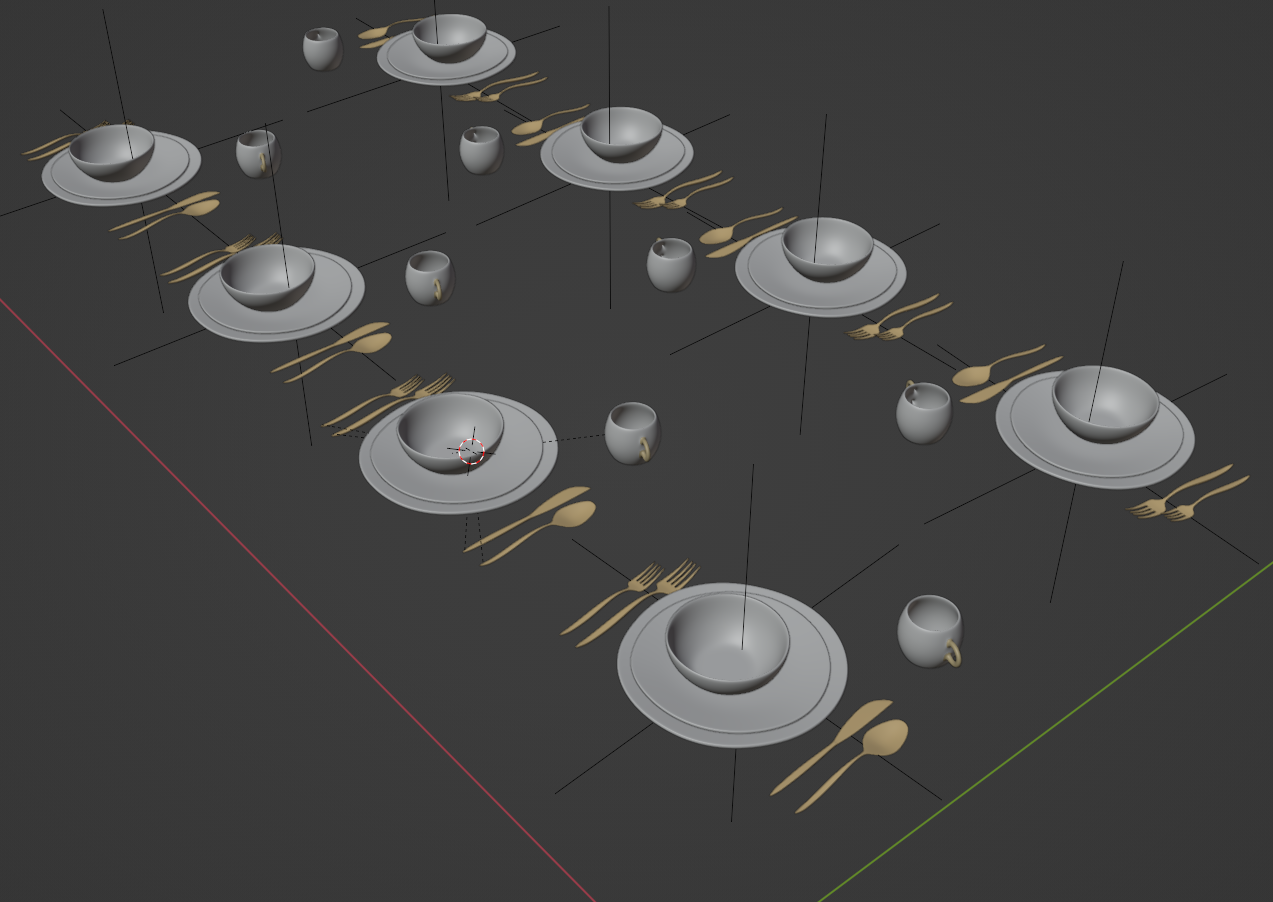
Well, as a quick example, lets say you add a bunch of objects to your scene like a dining table set. This set contains 10 items, and you’re going to duplicate it 8 times over a table. Every object is going to be identical and you don’t really need to move any objects around individually.
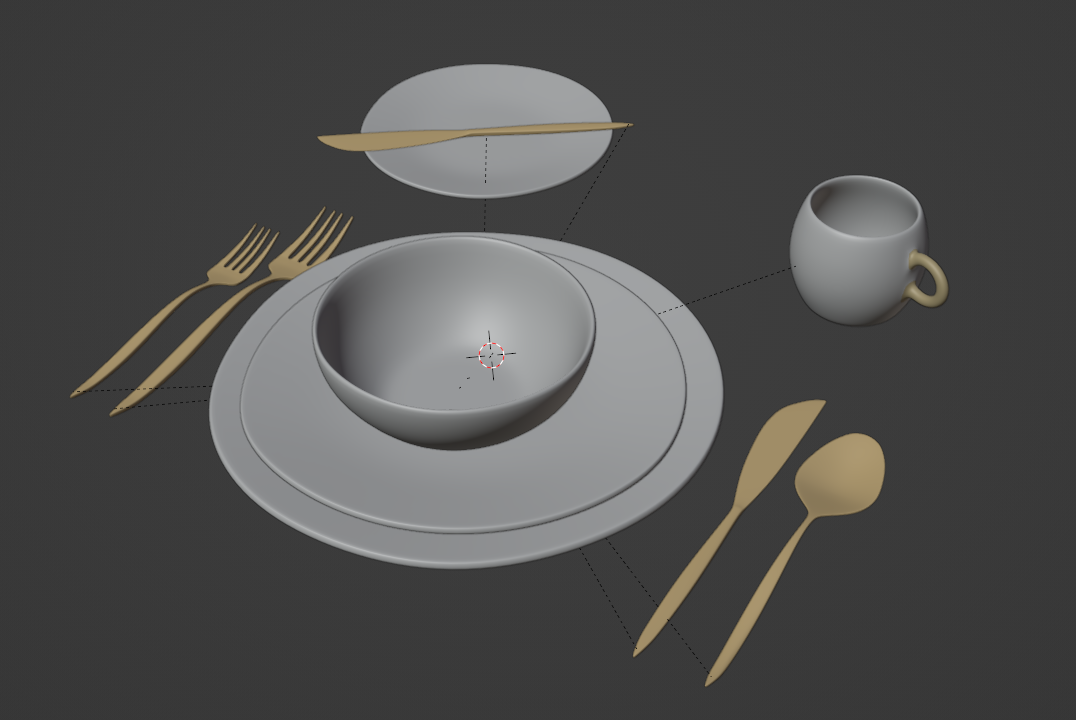
This is a perfect excuse to make a collection instance!
Put all the objects into a collection, set the origin point to the cursor and then instance the collection
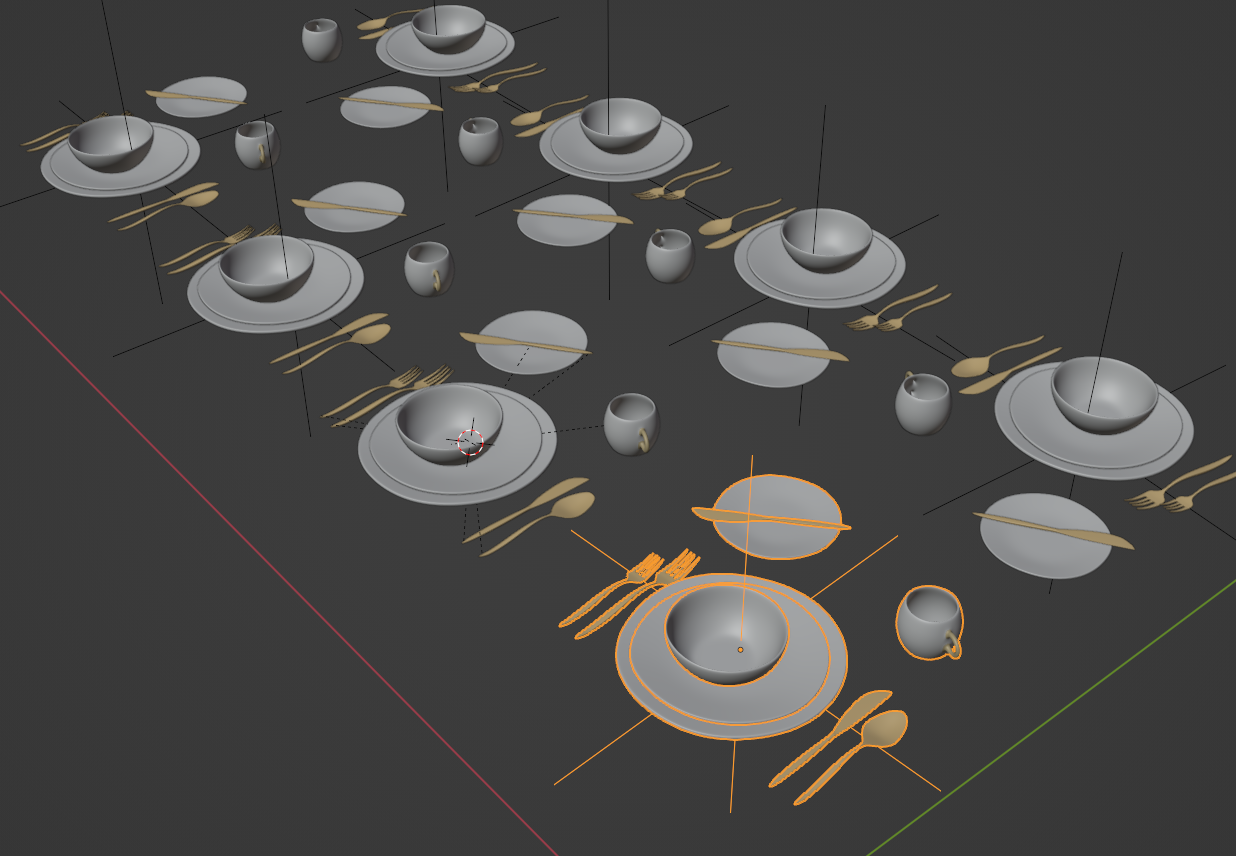
Now if we decide we don’t actually like the little knife and plate we can remove that from the original collection and all the instances will update too!
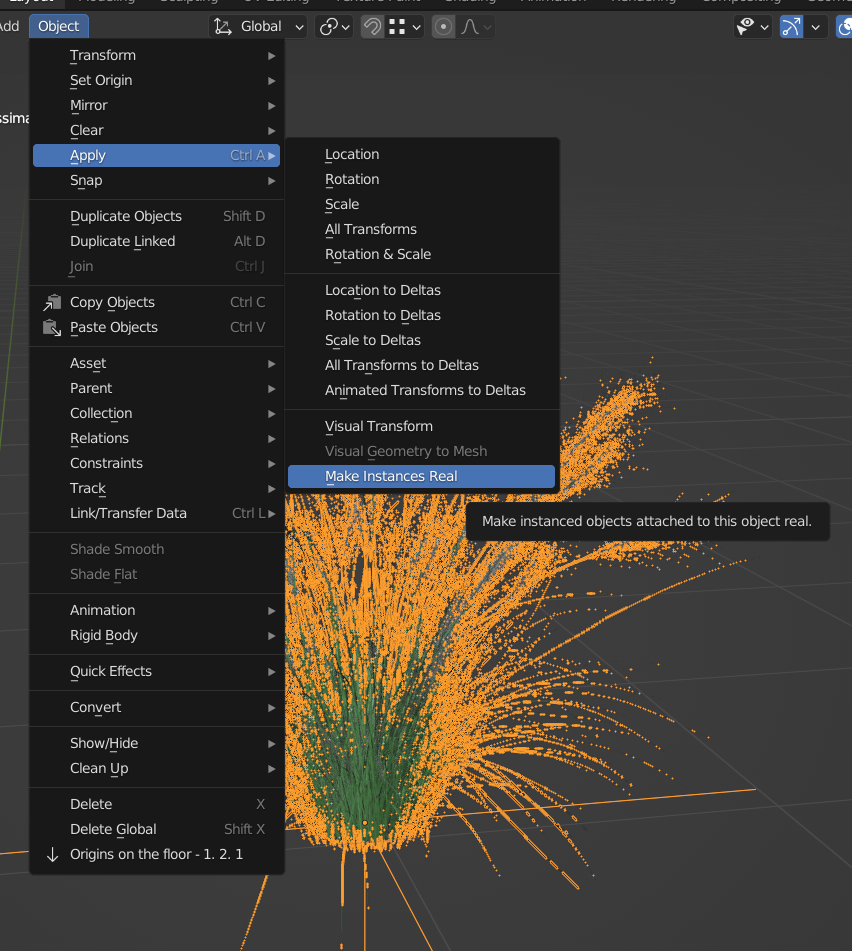
How do I make a collection instance separate?
If you have made a collection instance but you decide you want the objects separate. You can make them a new single user by clicking on the collection instance and going to
Object > Apply > Make instances real